

nginx和tomcat访问图片和静态页面怎么配置

第一种方法:nginx配置下
1、创建文件路径:
[root@localhost /]# mkdir /data/soft/
[root@localhost ~]# cd /data/soft/
[root@localhost soft]# mkdir html images
2、在images目录下面放入图片
[root@localhost soft]# cd images/
[root@localhost images]# ll
总用量 80
-rw-r--r--. 1 root root 9503 4月 25 17:06 thpzfulfjn.jpg
-rw-r--r--. 1 root root 16083 4月 25 17:06 thr2c5vcmz.jpg
-rw-r--r--. 1 root root 12218 4月 25 17:06 thrg3yx53t.jpg
-rw-r--r--. 1 root root 15048 4月 25 17:06 thsuf51vtr.jpg
-rw-r--r--. 1 root root 21799 4月 25 17:06 thvwslf8ze.jpg
3、在html目录下面放入一个测试文件
[root@localhost html]# cat index.html
this is test page !!!!
4、安装nginx,并启动
选用yum还是编译看自己喜好,我选择编译,自己制定安装模块
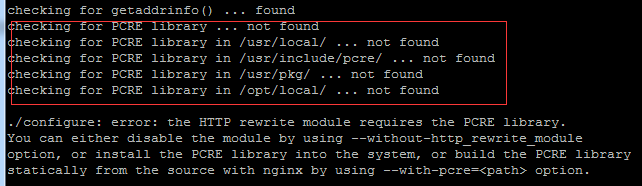
解压pcre-8.34.tar.gz zlib-1.2.8.tar.gz openssl-1.0.1g.tar.gz三个包并安装
tar -zxvf pcre-8.34.tar.gz
cd pcre-8.34
/configure && make && make install
tar -zxvf zlib-1.2.8.tar.gz
cd zlib-1.2.8
/configure && make && make install
tar -zxvf openssl-1.0.1g.tar.gz
cd openssl-1.0.1g
/config && make && make install
安装nginx
tar -zxvf nginx-1.9.0.tar.gz
cd nginx-1.9.0
#./configure --prefix=/data/soft/nginx \
--user=www \
--group=www \
--with-mail \
--with-mail_ssl_module \
--with-http_ssl_module \
--with-http_flv_module \
--with-http_dav_module \
--with-http_sub_module \
--with-http_spdy_module \
--with-http_realip_module \
--with-http_addition_module \
--with-http_gzip_static_module \
--with-http_stub_status_module \
--with-pcre=/data/src/pcre-8.34 \
--with-zlib=/data/src/zlib-1.2.8 \
--with-openssl=/data/src/openssl-1.0.1g
编译并安装
make && make install
groupadd www
useradd -g www www
修改nginx配置文件
[root@localhost nginx]# vim conf/nginx.conf
 server {
  listen 80;
  server_name localhost;
  #charset koi8-r;
  #access_log logs/host.access.log main;
  location ~ .*\.(gif|jpg|jpeg|png)$ {
   expires 24h;
   root /data/soft/images/;#指定图片存放路径
   access_log /data/soft/nginx/logs/images.log;#日志存放路径
   proxy_store on;
   proxy_store_access user:rw group:rw all:rw;
   proxy_temp_path /data/soft/images/;#图片访问路径
   proxy_redirect off;
   proxy_set_header host 127.0.0.1;
   client_max_body_size 10m;
   client_body_buffer_size 1280k;
   proxy_connect_timeout 900;
   proxy_send_timeout 900;
   proxy_read_timeout 900;
   proxy_buffer_size 40k;
   proxy_buffers 40 320k;
   proxy_busy_buffers_size 640k;
   proxy_temp_file_write_size 640k;
   if ( !-e $request_filename)
   {
     proxy_pass http://127.0.0.1;#默认80端口
   }
  }
   location / {
   root /data//soft/html; #html访问路径
   index index.html index2.htm; #html文件名称
   }
  }
error_page 404 /404.html;5 、此时可以测试看看
先是html页面

在看看图片
显然,nginx设置下静态页面和图片是可以访问成功的,下面开始tomcat访问设置
第二种方法:tomcat
1、查看jdk版本
 java -version
openjdk version "1.8.0_65"
openjdk runtime environment (build 1.8.0_65-b17)
openjdk 64-bit server vm (build 25.65-b01, mixed mode)
2、解压tomcat并启动
tar -xvf apache-tomcat-8.5.30.tar.gz
[root@localhost tomcat]# sh bin/startup.sh
3、本地测试能不能访问
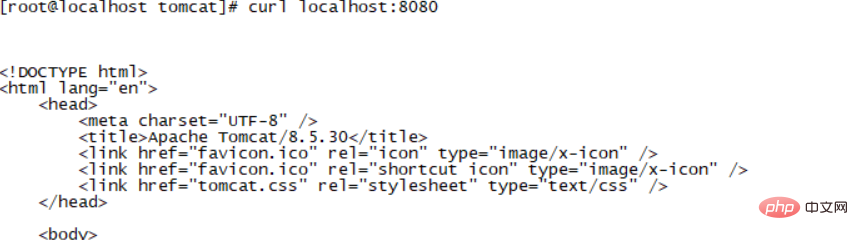
4、 上面正常,那么把页面文件夹放到wepapps下面去,注意,html文件夹里有inde.html页面的。
[root@localhost soft]# cp -rp html/ /data/soft/tomcat/webapps/
测试访问html页面
继续把图片文件夹放到wepapps下面去,images下面是有图片的。
[root@localhost images]# cp -rp /data/soft/images/ /data/soft/tomcat/webapps/
直接在浏览器上访问如下
以上是nginx和tomcat访问图片和静态页面怎么配置的详细内容。更多信息请关注PHP中文网其他相关文章!

热AI工具

Undresser.AI Undress
人工智能驱动的应用程序,用于创建逼真的裸体照片

AI Clothes Remover
用于从照片中去除衣服的在线人工智能工具。

Undress AI Tool
免费脱衣服图片

Clothoff.io
AI脱衣机

AI Hentai Generator
免费生成ai无尽的。

热门文章
热工具

记事本++7.3.1
好用且免费的代码编辑器

SublimeText3汉化版
中文版,非常好用

禅工作室 13.0.1
功能强大的PHP集成开发环境

Dreamweaver CS6
视觉化网页开发工具

SublimeText3 Mac版
神级代码编辑软件(SublimeText3)
热门话题


 html文件怎么生成网址
Apr 21, 2024 pm 12:57 PM
html文件怎么生成网址
Apr 21, 2024 pm 12:57 PM
要将 HTML 文件转换为网址,需要使用网络服务器,包括以下步骤:获取网络服务器。设置网络服务器。上传 HTML 文件。创建域名。路由请求。
 tomcat出现乱码的原因
Apr 21, 2024 am 10:18 AM
tomcat出现乱码的原因
Apr 21, 2024 am 10:18 AM
Tomcat乱码原因:1. 字符集不匹配;2. HTTP响应头未正确设置;3. 过滤器或编码器配置错误;4. 网页编码不正确;5. 其他原因(包括服务器端语言、数据库编码和代理服务器问题)。
 eclipse如何添加服务器
May 05, 2024 pm 07:27 PM
eclipse如何添加服务器
May 05, 2024 pm 07:27 PM
要将服务器添加到 Eclipse,请执行以下步骤:创建服务器运行时环境配置服务器创建服务器实例选择服务器运行时环境配置服务器实例启动服务器部署项目
 tomcat启动后如何访问页面
Apr 21, 2024 am 10:30 AM
tomcat启动后如何访问页面
Apr 21, 2024 am 10:30 AM
要访问 Tomcat 启动后的页面,需要:启动 Tomcat 服务器;确定端口号(默认 8080);拼接 URL,包括 IP 地址、端口号和页面路径;使用 Web 浏览器访问拼接好的 URL;识别 Tomcat 欢迎页;使用相同格式访问其他页面。
 如何使用 PHP 部署和维护网站
May 03, 2024 am 08:54 AM
如何使用 PHP 部署和维护网站
May 03, 2024 am 08:54 AM
要成功部署和维护PHP网站,需要执行以下步骤:选择Web服务器(如Apache或Nginx)安装PHP创建数据库并连接PHP上传代码到服务器设置域名和DNS监控网站维护步骤包括更新PHP和Web服务器、备份网站、监控错误日志和更新内容。
 如何使用 Fail2Ban 保护服务器免受暴力攻击
Apr 27, 2024 am 08:34 AM
如何使用 Fail2Ban 保护服务器免受暴力攻击
Apr 27, 2024 am 08:34 AM
Linux管理员的一个重要任务是保护服务器免受非法攻击或访问。默认情况下,Linux系统带有配置良好的防火墙,比如iptables、UncomplicatedFirewall(UFW),ConfigServerSecurityFirewall(CSF)等,可以防止多种攻击。任何连接到互联网的机器都是恶意攻击的潜在目标。有一个名为Fail2Ban的工具可用来缓解服务器上的非法访问。什么是Fail2Ban?Fail2Ban[1]是一款入侵防御软件,可以保护服务器免受暴力攻击。它是用Python编程语
 tomcat怎么部署war包
Apr 21, 2024 am 10:23 AM
tomcat怎么部署war包
Apr 21, 2024 am 10:23 AM
部署 WAR 包到 Tomcat 的步骤如下:将 WAR 包复制到 Tomcat 的 webapps 目录下。启动 Tomcat 服务器,它将自动部署 WAR 包。通过在浏览器中输入应用程序的上下文路径来访问应用程序。
 和我一起来学习Linux安装Nginx
Apr 28, 2024 pm 03:10 PM
和我一起来学习Linux安装Nginx
Apr 28, 2024 pm 03:10 PM
而今天将来一起带领大家在Linux环境安装Nginx,这里用的Linux系统是CentOS7.2.准备安装工具1.从Nginx官网下载Nginx。这里用的版本为:1.13.6.2.将下载下来的Nginx上传到Linux上,这里以/opt/nginx目录为例。运行“tar-zxvfnginx-1.13.6.tar.gz”进行解压。3.切换到/opt/nginx/nginx-1.13.6目录下,运行./configure进行初始化配置。如出现下面的提示,说明该机器没有安装PCRE,而Nginx需要依
