

怎么使用nginx模拟进行金丝雀发布

金丝雀发布/灰度发布
金丝雀发布的重点在于:试错。金丝雀发布的来历本身就是自然界的美丽生物在人类工业发展过程中的一个悲惨的故事。金丝雀就是用它的生命来为矿工的安全来试错的。用很小的成本来换取整体的安全,在持续部署的实践中,金丝雀就是流量控制,用很少的流量比如百分之一或者十分之一用于检证某个版本是否正常,如果不正常则就用最低的成本实现了其作用,降低了风险。如果正常,则可以逐渐加大权重直至百分之百,将所有的流量都平稳地切换至新的版本。灰度发布,一般来说也是类似的概念。灰色是介于黑和白之前的一个过渡,区别于蓝绿部署的非蓝即绿,灰度发布/金丝雀发布会有一个两者同时存在的时间段,只是两者对应的流量不同,金丝雀发布如果说和灰度发布有所不同的话,其不同点应该是目的性的不同,金丝雀发布目的在于试错,而灰度发布在于平稳发布,而在金丝雀发布没有问题的状况下进行的平稳过渡则正是灰度发布。
模拟金丝雀发布
接下来我们使用nginx的upstream来简单模拟一下金丝雀发布的场景。具体场景如下, 当前活跃的是主版本,通过调整nginx设定,通过不断的调节金丝雀版本的权重,最终实现平稳地发布。

事前准备
事前在7001/7002两个端口分别启动两个服务,用于显示不同信息,为了演示方便,使用tornado做了一个镜像,通过docker容器启动时传递的参数不同用于显示服务的不同。
docker run -d -p 7001:8080 liumiaocn/tornado:latest python /usr/local/bin/daemon.py "hello main service: v1 in 7001"
docker run -d -p 7002:8080 liumiaocn/tornado:latest python /usr/local/bin/daemon.py "hello canary deploy service: v2 in 7002"
执行日志
[root@kong ~]# docker run -d -p 7001:8080 liumiaocn/tornado:latest python /usr/local/bin/daemon.py "hello main service: v1 in 7001"
28f42bbd21146c520b05ff2226514e62445b4cdd5d82f372b3791fdd47cd602a
[root@kong ~]# docker run -d -p 7002:8080 liumiaocn/tornado:latest python /usr/local/bin/daemon.py "hello canary deploy service: v2 in 7002"
b86c4b83048d782fadc3edbacc19b73af20dc87f5f4cf37cf348d17c45f0215d
[root@kong ~]# curl http://192.168.163.117:7001
hello, service :hello main service: v1 in 7001
[root@kong ~]# curl http://192.168.163.117:7002
hello, service :hello canary deploy service: v2 in 7002
[root@kong ~]#
启动nginx
[root@kong ~]# docker run -p 9080:80 --name nginx-canary -d nginx
659f15c4d006df6fcd1fab1efe39e25a85c31f3cab1cda67838ddd282669195c
[root@kong ~]# docker ps |grep nginx-canary
659f15c4d006    nginx           "nginx -g 'daemon ..."  7 seconds ago    up 7 seconds    0.0.0.0:9080->80/tcp   nginx-canary
[root@kong ~]#
nginx代码段
准备如下nginx代码段将其添加到nginx的/etc/nginx/conf.d/default.conf中, 模拟方式很简单,通过down来表示流量为零(nginx中无法将weight设置为零),开始的时候100%的流量都发到主版本。
http {
upstream nginx_canary {
  server 192.168.163.117:7001 weight=100;
  server 192.168.163.117:7002 down;
}
server {
  listen    80;
  server_name www.liumiao.cn 192.168.163.117;
  location / {
    proxy_pass http://nginx_canary;
  }
}修改default.conf的方法
可以通过在容器中安装vim达到效果,也可以在本地修改然后通过docker cp传入,或者直接sed修改都可。如果在容器中安装vim,使用如下方式即可
[root@kong ~]# docker exec -it nginx-lb sh
# apt-get update
...省略
# apt-get install vim
...省略
修改前
# cat default.conf
server {
  listen    80;
  server_name localhost;
  #charset koi8-r;
  #access_log /var/log/nginx/host.access.log main;
  location / {
    root  /usr/share/nginx/html;
    index index.html index.htm;
  }
  #error_page 404       /404.html;
  # redirect server error pages to the static page /50x.html
  #
  error_page  500 502 503 504 /50x.html;
  location = /50x.html {
    root  /usr/share/nginx/html;
  }
  # proxy the php scripts to apache listening on 127.0.0.1:80
  #
  #location ~ \.php$ {
  #  proxy_pass  http://127.0.0.1;
  #}
  # pass the php scripts to fastcgi server listening on 127.0.0.1:9000
  #
  #location ~ \.php$ {
  #  root      html;
  #  fastcgi_pass  127.0.0.1:9000;
  #  fastcgi_index index.php;
  #  fastcgi_param script_filename /scripts$fastcgi_script_name;
  #  include    fastcgi_params;
  #}
  # deny access to .htaccess files, if apache's document root
  # concurs with nginx's one
  #
  #location ~ /\.ht {
  #  deny all;
  #}
}
#修改后
# cat default.conf
upstream nginx_canary {
  server 192.168.163.117:7001 weight=100;
  server 192.168.163.117:7002 down;
}
server {
  listen    80;
  server_name www.liumiao.cn 192.168.163.117;
  #charset koi8-r;
  #access_log /var/log/nginx/host.access.log main;
  location / {
    #root  /usr/share/nginx/html;
    #index index.html index.htm;
    proxy_pass http://nginx_canary;
  }
  #error_page 404       /404.html;
  # redirect server error pages to the static page /50x.html
  #
  error_page  500 502 503 504 /50x.html;
  location = /50x.html {
    root  /usr/share/nginx/html;
  }
  # proxy the php scripts to apache listening on 127.0.0.1:80
  #
  #location ~ \.php$ {
  #  proxy_pass  http://127.0.0.1;
  #}
  # pass the php scripts to fastcgi server listening on 127.0.0.1:9000
  #
  #location ~ \.php$ {
  #  root      html;
  #  fastcgi_pass  127.0.0.1:9000;
  #  fastcgi_index index.php;
  #  fastcgi_param script_filename /scripts$fastcgi_script_name;
  #  include    fastcgi_params;
  #}
  # deny access to .htaccess files, if apache's document root
  # concurs with nginx's one
  #
  #location ~ /\.ht {
  #  deny all;
  #}
}
#重新加载nginx设定
# nginx -s reload
2018/05/28 05:16:20 [notice] 319#319: signal process started
#
确认结果
10次调用全部输出的都是v1 in 7001
[root@kong ~]# cnt=0; while [ $cnt -lt 10 ]; do curl ; let cnt ; done
hello, service :hello main service: v1 in 7001
hello, service :hello main service: v1 in 7001
hello, service :hello main service: v1 in 7001
hello, service :hello main service: v1 in 7001
hello, service :hello main service: v1 in 7001
hello, service :hello main service: v1 in 7001
hello, service :hello main service: v1 in 7001
hello, service :hello main service: v1 in 7001
hello, service :hello main service: v1 in 7001
hello, service :hello main service: v1 in 7001
[root@kong ~]#
金丝雀发布: 金丝雀版本流量权重10%
通过调整default.conf的weight,然后执行nginx -s reload的方式,调节金丝雀版本的权重为10%,流量的10%会执行新的服务
修改default.conf的方法
只需要将upstream中的server的权重做如下调整:
upstream nginx_canary {
  server 192.168.163.117:7001 weight=10;
  server 192.168.163.117:7002 weight=90;
}重新加载nginx设定
# nginx -s reload
2018/05/28 05:20:14 [notice] 330#330: signal process started
#
确认结果
[root@kong ~]# cnt=0; while [ $cnt -lt 10 ]; do curl ; let cnt ; done
hello, service :hello canary deploy service: v2 in 7002
hello, service :hello canary deploy service: v2 in 7002
hello, service :hello canary deploy service: v2 in 7002
hello, service :hello canary deploy service: v2 in 7002
hello, service :hello main service: v1 in 7001
hello, service :hello canary deploy service: v2 in 7002
hello, service :hello canary deploy service: v2 in 7002
hello, service :hello canary deploy service: v2 in 7002
hello, service :hello canary deploy service: v2 in 7002
hello, service :hello canary deploy service: v2 in 7002
[root@kong ~]#
金丝雀发布: 金丝雀版本流量权重50%
通过调整default.conf的weight,然后执行nginx -s reload的方式,调节金丝雀版本的权重为50%,流量的50%会执行新的服务
修改default.conf的方法
只需要将upstream中的server的权重做如下调整:
upstream nginx_canary {
  server 192.168.163.117:7001 weight=50;
  server 192.168.163.117:7002 weight=50;
}重新加载nginx设定
# nginx -s reload
2018/05/28 05:22:26 [notice] 339#339: signal process started
#
确认结果
[root@kong ~]# cnt=0; while [ $cnt -lt 10 ]; do curl ; let cnt++; done
hello, service :hello main service: v1 in 7001
hello, service :hello canary deploy service: v2 in 7002
hello, service :hello main service: v1 in 7001
hello, service :hello canary deploy service: v2 in 7002
hello, service :hello main service: v1 in 7001
hello, service :hello canary deploy service: v2 in 7002
hello, service :hello main service: v1 in 7001
hello, service :hello canary deploy service: v2 in 7002
hello, service :hello main service: v1 in 7001
hello, service :hello canary deploy service: v2 in 7002
[root@kong ~]#
金丝雀发布: 金丝雀版本流量权重90%
通过调整default.conf的weight,然后执行nginx -s reload的方式,调节金丝雀版本的权重为90%,流量的90%会执行新的服务
修改default.conf的方法
只需要将upstream中的server的权重做如下调整:
upstream nginx_canary {
  server 192.168.163.117:7001 weight=10;
  server 192.168.163.117:7002 weight=90;
}重新加载nginx设定
# nginx -s reload
2018/05/28 05:24:29 [notice] 346#346: signal process started
#
确认结果
[root@kong ~]# cnt=0; while [ $cnt -lt 10 ]; do curl ; let cnt++; done
hello, service :hello canary deploy service: v2 in 7002
hello, service :hello canary deploy service: v2 in 7002
hello, service :hello canary deploy service: v2 in 7002
hello, service :hello canary deploy service: v2 in 7002
hello, service :hello main service: v1 in 7001
hello, service :hello canary deploy service: v2 in 7002
hello, service :hello canary deploy service: v2 in 7002
hello, service :hello canary deploy service: v2 in 7002
hello, service :hello canary deploy service: v2 in 7002
hello, service :hello canary deploy service: v2 in 7002
[root@kong ~]#
金丝雀发布: 金丝雀版本流量权重100%
通过调整default.conf的weight,然后执行nginx -s reload的方式,调节金丝雀版本的权重为100%,流量的100%会执行新的服务
修改default.conf的方法
只需要将upstream中的server的权重做如下调整:
upstream nginx_canary {
  server 192.168.163.117:7001 down;
  server 192.168.163.117:7002 weight=100;
}重新加载nginx设定
# nginx -s reload
2018/05/28 05:26:37 [notice] 353#353: signal process started
确认结果
[root@kong ~]# cnt=0; while [ $cnt -lt 10 ]; do curl ; let cnt++; done
hello, service :hello canary deploy service: v2 in 7002
hello, service :hello canary deploy service: v2 in 7002
hello, service :hello canary deploy service: v2 in 7002
hello, service :hello canary deploy service: v2 in 7002
hello, service :hello canary deploy service: v2 in 7002
hello, service :hello canary deploy service: v2 in 7002
hello, service :hello canary deploy service: v2 in 7002
hello, service :hello canary deploy service: v2 in 7002
hello, service :hello canary deploy service: v2 in 7002
hello, service :hello canary deploy service: v2 in 7002
[root@kong ~]#
以上是怎么使用nginx模拟进行金丝雀发布的详细内容。更多信息请关注PHP中文网其他相关文章!

热AI工具

Undresser.AI Undress
人工智能驱动的应用程序,用于创建逼真的裸体照片

AI Clothes Remover
用于从照片中去除衣服的在线人工智能工具。

Undress AI Tool
免费脱衣服图片

Clothoff.io
AI脱衣机

AI Hentai Generator
免费生成ai无尽的。

热门文章
热工具

记事本++7.3.1
好用且免费的代码编辑器

SublimeText3汉化版
中文版,非常好用

禅工作室 13.0.1
功能强大的PHP集成开发环境

Dreamweaver CS6
视觉化网页开发工具

SublimeText3 Mac版
神级代码编辑软件(SublimeText3)
热门话题


 tomcat服务器怎么让外网访问
Apr 21, 2024 am 07:22 AM
tomcat服务器怎么让外网访问
Apr 21, 2024 am 07:22 AM
要让 Tomcat 服务器对外网访问,需要:修改 Tomcat 配置文件,允许外部连接。添加防火墙规则,允许访问 Tomcat 服务器端口。创建 DNS 记录,将域名指向 Tomcat 服务器公有 IP。可选:使用反向代理提升安全性和性能。可选:设置 HTTPS 以提高安全性。
 html文件怎么生成网址
Apr 21, 2024 pm 12:57 PM
html文件怎么生成网址
Apr 21, 2024 pm 12:57 PM
要将 HTML 文件转换为网址,需要使用网络服务器,包括以下步骤:获取网络服务器。设置网络服务器。上传 HTML 文件。创建域名。路由请求。
 nodejs项目怎么部署到服务器
Apr 21, 2024 am 04:40 AM
nodejs项目怎么部署到服务器
Apr 21, 2024 am 04:40 AM
Node.js 项目的服务器部署步骤:准备部署环境:获取服务器访问权限、安装 Node.js、设置 Git 存储库。构建应用程序:使用 npm run build 生成可部署代码和依赖项。上传代码到服务器:通过 Git 或文件传输协议。安装依赖项:SSH 登录服务器并使用 npm install 安装应用程序依赖项。启动应用程序:使用 node index.js 等命令启动应用程序,或使用 pm2 等进程管理器。配置反向代理(可选):使用 Nginx 或 Apache 等反向代理路由流量到应用程
 nodejs可以外网访问么
Apr 21, 2024 am 04:43 AM
nodejs可以外网访问么
Apr 21, 2024 am 04:43 AM
是的,Node.js 可以外网访问。您可以使用以下方法:使用 Cloud Functions 部署函数并公开访问。使用 Express 框架创建路由并定义端点。使用 Nginx 反向代理请求到 Node.js 应用程序。使用 Docker 容器运行 Node.js 应用程序并通过端口映射公开。
 如何使用 PHP 部署和维护网站
May 03, 2024 am 08:54 AM
如何使用 PHP 部署和维护网站
May 03, 2024 am 08:54 AM
要成功部署和维护PHP网站,需要执行以下步骤:选择Web服务器(如Apache或Nginx)安装PHP创建数据库并连接PHP上传代码到服务器设置域名和DNS监控网站维护步骤包括更新PHP和Web服务器、备份网站、监控错误日志和更新内容。
 如何使用 Fail2Ban 保护服务器免受暴力攻击
Apr 27, 2024 am 08:34 AM
如何使用 Fail2Ban 保护服务器免受暴力攻击
Apr 27, 2024 am 08:34 AM
Linux管理员的一个重要任务是保护服务器免受非法攻击或访问。默认情况下,Linux系统带有配置良好的防火墙,比如iptables、UncomplicatedFirewall(UFW),ConfigServerSecurityFirewall(CSF)等,可以防止多种攻击。任何连接到互联网的机器都是恶意攻击的潜在目标。有一个名为Fail2Ban的工具可用来缓解服务器上的非法访问。什么是Fail2Ban?Fail2Ban[1]是一款入侵防御软件,可以保护服务器免受暴力攻击。它是用Python编程语
 和我一起来学习Linux安装Nginx
Apr 28, 2024 pm 03:10 PM
和我一起来学习Linux安装Nginx
Apr 28, 2024 pm 03:10 PM
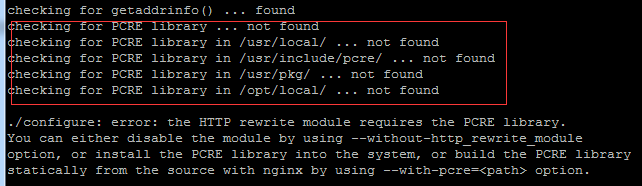
而今天将来一起带领大家在Linux环境安装Nginx,这里用的Linux系统是CentOS7.2.准备安装工具1.从Nginx官网下载Nginx。这里用的版本为:1.13.6.2.将下载下来的Nginx上传到Linux上,这里以/opt/nginx目录为例。运行“tar-zxvfnginx-1.13.6.tar.gz”进行解压。3.切换到/opt/nginx/nginx-1.13.6目录下,运行./configure进行初始化配置。如出现下面的提示,说明该机器没有安装PCRE,而Nginx需要依
 keepalived+nginx搭建高可用几个注意点
Apr 23, 2024 pm 05:50 PM
keepalived+nginx搭建高可用几个注意点
Apr 23, 2024 pm 05:50 PM
在yum安装完keepalived之后,配置keepalived的配置文件注意点在master和backup的keepalived的配置文件中,网卡名字为当前机器的网卡名称VIP的选择为可用的一个ip,通常在做高可用,局域网环境比较多,所以这个vip是和两台机器同网段的一个内网ip。如果用在外网环境下,无所谓在不在一个网段,只要客户端能访问到。停掉nginx服务,启动keepalived服务,会看到keepalived拉动nginx服务启动若是无法启动失败,基本都是配置文件和脚本的问题,或者是防
