

springboot图片验证码功能模块怎么实现

具体效果如下:
第一步:工具类
该工具类为生成验证码图片的核心,直接拷贝到项目即可,无需做修改;可个性化的参数全部对外提供的API,比如 字体大小,背景颜色,干扰线数量,高宽等都可以根据自己的需求设置对应参数;
代码几乎每一行都加了详细的注释;如果遇上特殊的个性化需求,调整一下这个工具类即可实现。
package com.feng.util;
/**
 * @return null
 * @author Ladidol
 * @description
 * @date 2022/4/11 22:15
 */
import java.awt.*;
import java.awt.geom.AffineTransform;
import java.awt.image.BufferedImage;
import java.util.Random;
/**
 * 图形验证码生成
 */
public class VerifyUtil {
    // 默认验证码字符集
    private static final char[] chars = {
            '0', '1', '2', '3', '4', '5', '6', '7', '8', '9',
            'a', 'b', 'c', 'd', 'e', 'f', 'g', 'h', 'i', 'j', 'k', 'l', 'm', 'n', 'o', 'p', 'q', 'r', 's', 't', 'u', 'v', 'w', 'x', 'y', 'z',
            'A', 'B', 'C', 'D', 'E', 'F', 'G', 'H', 'I', 'J', 'K', 'L', 'M', 'N', 'O', 'P', 'Q', 'R', 'S', 'T', 'U', 'V', 'W', 'X', 'Y', 'Z'};
    // 默认字符数量
    private final Integer SIZE;
    // 默认干扰线数量
    private final int LINES;
    // 默认宽度
    private final int WIDTH;
    // 默认高度
    private final int HEIGHT;
    // 默认字体大小
    private final int FONT_SIZE;
    // 默认字体倾斜
    private final boolean TILT;
    private final Color BACKGROUND_COLOR;
    /**
     * 初始化基础参数
     *
     * @param builder
     */
    private VerifyUtil(Builder builder) {
        SIZE = builder.size;
        LINES = builder.lines;
        WIDTH = builder.width;
        HEIGHT = builder.height;
        FONT_SIZE = builder.fontSize;
        TILT = builder.tilt;
        BACKGROUND_COLOR = builder.backgroundColor;
    }
    /**
     * 实例化构造器对象
     *
     * @return
     */
    public static Builder newBuilder() {
        return new Builder();
    }
    /**
     * @return 生成随机验证码及图片
     * Object[0]:验证码字符串;
     * Object[1]:验证码图片。
     */
    public Object[] createImage() {
        StringBuffer sb = new StringBuffer();
        // 创建空白图片
        BufferedImage image = new BufferedImage(WIDTH, HEIGHT, BufferedImage.TYPE_INT_RGB);
        // 获取图片画笔
        Graphics2D graphic = image.createGraphics();
        // 设置抗锯齿
        graphic.setRenderingHint(RenderingHints.KEY_ANTIALIASING, RenderingHints.VALUE_ANTIALIAS_ON);
        // 设置画笔颜色
        graphic.setColor(BACKGROUND_COLOR);
        // 绘制矩形背景
        graphic.fillRect(0, 0, WIDTH, HEIGHT);
        // 画随机字符
        Random ran = new Random();
        //graphic.setBackground(Color.WHITE);
        // 计算每个字符占的宽度,这里预留一个字符的位置用于左右边距
        int codeWidth = WIDTH / (SIZE + 1);
        // 字符所处的y轴的坐标
        int y = HEIGHT * 3 / 4;
        for (int i = 0; i < SIZE; i++) {
            // 设置随机颜色
            graphic.setColor(getRandomColor());
            // 初始化字体
            Font font = new Font(null, Font.BOLD + Font.ITALIC, FONT_SIZE);
            if (TILT) {
                // 随机一个倾斜的角度 -45到45度之间
                int theta = ran.nextInt(45);
                // 随机一个倾斜方向 左或者右
                theta = (ran.nextBoolean() == true) ? theta : -theta;
                AffineTransform affineTransform = new AffineTransform();
                affineTransform.rotate(Math.toRadians(theta), 0, 0);
                font = font.deriveFont(affineTransform);
            }
            // 设置字体大小
            graphic.setFont(font);
            // 计算当前字符绘制的X轴坐标
            int x = (i * codeWidth) + (codeWidth / 2);
            // 取随机字符索引
            int n = ran.nextInt(chars.length);
            // 得到字符文本
            String code = String.valueOf(chars[n]);
            // 画字符
            graphic.drawString(code, x, y);
            // 记录字符
            sb.append(code);
        }
        // 画干扰线
        for (int i = 0; i < LINES; i++) {
            // 设置随机颜色
            graphic.setColor(getRandomColor());
            // 随机画线
            graphic.drawLine(ran.nextInt(WIDTH), ran.nextInt(HEIGHT), ran.nextInt(WIDTH), ran.nextInt(HEIGHT));
        }
        // 返回验证码和图片
        return new Object[]{sb.toString(), image};
    }
    /**
     * 随机取色
     */
    private Color getRandomColor() {
        Random ran = new Random();
        Color color = new Color(ran.nextInt(256), ran.nextInt(256), ran.nextInt(256));
        return color;
    }
    /**
     * 构造器对象
     */
    public static class Builder {
        // 默认字符数量
        private int size = 4;
        // 默认干扰线数量
        private int lines = 10;
        // 默认宽度
        private int width = 80;
        // 默认高度
        private int height = 35;
        // 默认字体大小
        private int fontSize = 25;
        // 默认字体倾斜
        private boolean tilt = true;
        //背景颜色
        private Color backgroundColor = Color.LIGHT_GRAY;
        public Builder setSize(int size) {
            this.size = size;
            return this;
        }
        public Builder setLines(int lines) {
            this.lines = lines;
            return this;
        }
        public Builder setWidth(int width) {
            this.width = width;
            return this;
        }
        public Builder setHeight(int height) {
            this.height = height;
            return this;
        }
        public Builder setFontSize(int fontSize) {
            this.fontSize = fontSize;
            return this;
        }
        public Builder setTilt(boolean tilt) {
            this.tilt = tilt;
            return this;
        }
        public Builder setBackgroundColor(Color backgroundColor) {
            this.backgroundColor = backgroundColor;
            return this;
        }
        public VerifyUtil build() {
            return new VerifyUtil(this);
        }
    }
}第二步:图片生成:
使用默认参数:
//生成图片验证码
Object[] verify = VerifyUtil.newBuilder().build().createImage();
自定义参数生成:
// 这个根据自己的需要设置对应的参数来实现个性化
// 返回的数组第一个参数是生成的验证码,第二个参数是生成的图片
Object[] objs = VerifyUtil.newBuilder()
        .setWidth(120)   //设置图片的宽度
        .setHeight(35)   //设置图片的高度
        .setSize(6)      //设置字符的个数
        .setLines(10)    //设置干扰线的条数
        .setFontSize(25) //设置字体的大小
        .setTilt(true)   //设置是否需要倾斜
        .setBackgroundColor(Color.WHITE) //设置验证码的背景颜色
        .build()         //构建VerifyUtil项目
.createImage(); //生成图片整合到springboot项目中:
需要引入的maven依赖:
        <!--redis相关配置-->
        <dependency>
            <groupId>org.springframework.boot</groupId>
            <artifactId>spring-boot-starter-data-redis</artifactId>
        </dependency>
        <!-- redis 连接池 -->
        <!--新版本连接池lettuce-->
        <dependency>
            <groupId>org.apache.commons</groupId>
            <artifactId>commons-pool2</artifactId>
        </dependency>
        <!-- 图形验证码 -->
        <dependency>
            <groupId>net.jodah</groupId>
            <artifactId>expiringmap</artifactId>
            <version>0.5.10</version>
</dependency>获取相关的验证码:
service层:
package com.feng.service;

import org.cuit.epoch.result.Result;

import javax.servlet.http.HttpServletRequest;
import javax.servlet.http.HttpServletResponse;
import java.io.IOException;

/**
 * @return null
 * @author Ladidol
 * @description
 * @date 2022/4/11 22:15
 */

public interface VerifyService {
    /**
     * 创建图片验证码
     * @param response
     * @param request
     * @throws IOException
     */
    void createCode(HttpServletResponse response, HttpServletRequest request) throws IOException;
    /**
     * 检查图片验证码
     * @param
     * @param
     * @throws IOException
     */
    Result<String> checkCode(String verificationCode);
}serviceimpl层:
package com.feng.service.impl;
import com.feng.service.VerifyService;
import com.feng.util.RedisServiceImpl;
import com.google.common.net.HttpHeaders;
import com.feng.util.VerifyUtil;
import org.springframework.http.ResponseCookie;
import org.springframework.stereotype.Service;
import javax.annotation.Resource;
import javax.imageio.ImageIO;
import javax.servlet.http.HttpServletRequest;
import javax.servlet.http.HttpServletResponse;
import javax.servlet.http.HttpSession;
import java.awt.image.BufferedImage;
import java.io.IOException;
import java.io.OutputStream;
import java.time.Duration;
/**
* @return null
* @author Ladidol
* @description
* @date 2022/4/11 22:15
*/
@Service
public class VerifyServiceImpl implements VerifyService {
@Resource
RedisServiceImpl redisUtil;
/**
* 生成图片验证码
* @param response
* @param request
* @throws IOException
*/
@Override
public void createCode(HttpServletResponse response, HttpServletRequest request) throws IOException {
//获取session
HttpSession session = request.getSession();
//获得sessionId
String id = session.getId();
System.out.println();
ResponseCookie cookie = ResponseCookie.from("JSESSIONID",id)
.secure(true)
.domain("")
.path("/")
.maxAge(Duration.ofHours(1))
.sameSite("None")
.build();
//清除之前缓存的图片验证码
if (!String.valueOf(request.getSession().getAttribute("SESSION_VERIFY_CODE_"+id)).isEmpty()){
String getVerify = String.valueOf(request.getSession().getAttribute("SESSION_VERIFY_CODE_"+id));
redisUtil.del(getVerify);
System.out.println("清除成功");
}
//生成图片验证码,用的默认参数
Object[] verify = VerifyUtil.newBuilder().build().createImage();
//将验证码存入session
session.setAttribute("SESSION_VERIFY_CODE_" + id, verify[0]);
//打印验证码
System.out.println(verify[0]);
//将验证码存入redis
redisUtil.set((String) verify[0],id,5*60);
//将图片传给浏览器
BufferedImage image = (BufferedImage) verify[1];
response.setContentType("image/png");
response.setHeader(HttpHeaders.SET_COOKIE,cookie.toString());
OutputStream ops = response.getOutputStream();
ImageIO.write(image,"png",ops);
}
@Override
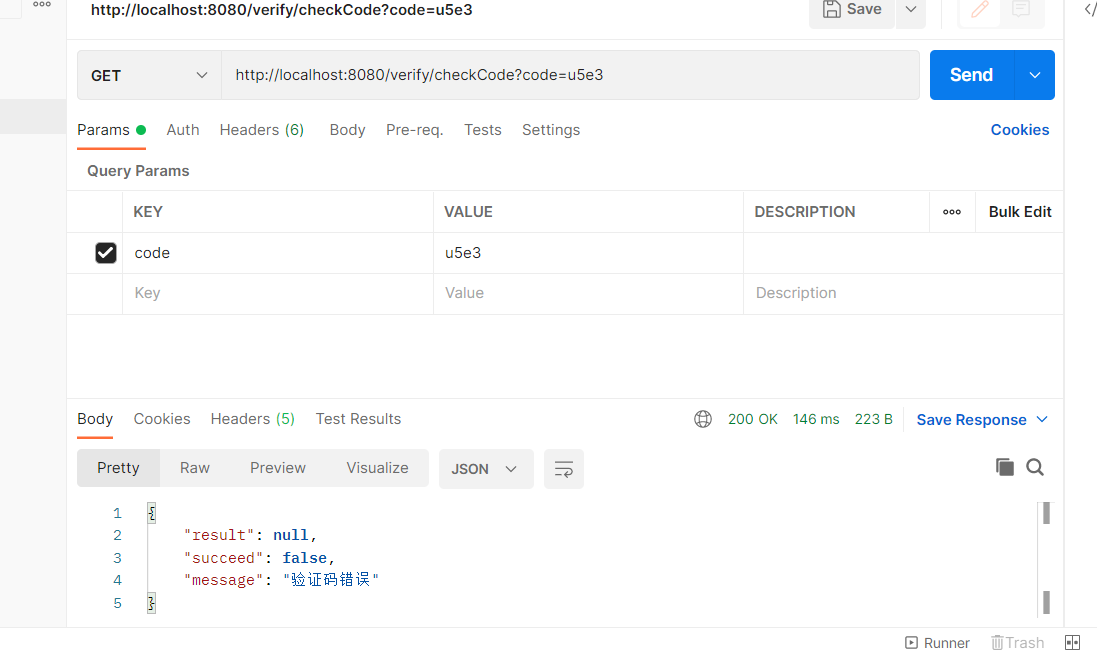
public Result<String> checkCode(String verificationCode){
if (!redisUtil.hasKey(verificationCode)){
return new Result<>(false,"验证码错误");
}
redisUtil.del(verificationCode);
return R.success();
}
}这里面还会用到redis相关的工具类,我就不列出来了,想要的话可以看我以前的博客工具类戳这里
controller层:
这里有用到@RequiredArgsConstructor, 就是简单的注入而已, 如果想要详细了解戳这里
package com.feng.controller;
import lombok.RequiredArgsConstructor;
import com.feng.annotation.LimitRequest;
import com.feng.service.VerifyService;
import org.springframework.web.bind.annotation.*;
import javax.servlet.http.HttpServletRequest;
import javax.servlet.http.HttpServletResponse;
import java.io.IOException;
/**
 * @return null
 * @author Ladidol
 * @description 这里主要就是多种验证码和登录相关的东西
 * @date 2022/4/11 21:46
 */
@RestController
@RequestMapping("/verify")
@RequiredArgsConstructor//这是在lombok工具给的注入方式,真帅
public class VerifyController {
    private final VerifyService verifyService;
    /**
     * 获取图片验证码
     */
    @LimitRequest(count = 5)//这个注解就是表示, 你在限制时间里(我们这里默认是六秒钟), 只能请求五次
    @GetMapping("/getCode")
    public void getCode(HttpServletResponse response, HttpServletRequest request) throws IOException {
        verifyService.createCode(response, request);
    }
    @LimitRequest(count = 5)//这个注解就是表示, 你在限制时间里(我们这里默认是六秒钟), 只能请求五次
    @GetMapping("/checkCode")
    public Result<String> checkCode(String code){
        return verifyService.checkCode(code);
    }
}这里为了不被一直无限制的访问该服务, 我们用了一个限制ip访问次数的注解@LimitRequest
annotion包下的注解类:
package com.feng.annotation;

import java.lang.annotation.*;

/**
 * @return null
 * @author Ladidol
 * @description 限制ip访问次数注解
 * @date 2022/4/11 22:15
 */

@Documented
@Target(ElementType.METHOD) // 说明该注解只能放在方法上面
@Retention(RetentionPolicy.RUNTIME)
public @interface LimitRequest {
    long time() default 6000; // 限制时间 单位:毫秒
    int count() default 3; // 允许请求的次数

}aspect包下的切面类:
package com.feng.aspect;
import net.jodah.expiringmap.ExpirationPolicy;
import net.jodah.expiringmap.ExpiringMap;
import org.aspectj.lang.ProceedingJoinPoint;
import org.aspectj.lang.annotation.Around;
import org.aspectj.lang.annotation.Aspect;
import org.aspectj.lang.annotation.Pointcut;
import com.feng.annotation.LimitRequest;
import org.cuit.epoch.exception.AppException;
import org.springframework.stereotype.Component;
import org.springframework.web.context.request.RequestAttributes;
import org.springframework.web.context.request.RequestContextHolder;
import org.springframework.web.context.request.ServletRequestAttributes;
import javax.servlet.http.HttpServletRequest;
import java.util.concurrent.ConcurrentHashMap;
import java.util.concurrent.TimeUnit;
/**
* @return null
* @author Ladidol
* @description
* @date 2022/4/11 22:15
*/
@Aspect
@Component
public class LimitRequestAspect {
private static ConcurrentHashMap<String, ExpiringMap<String, Integer>> book = new ConcurrentHashMap<>();
// 定义切点
// 让所有有@LimitRequest注解的方法都执行切面方法
@Pointcut("@annotation(limitRequest)")
public void excudeService(LimitRequest limitRequest) {
}
@Around("excudeService(limitRequest)")
public Object doAround(ProceedingJoinPoint pjp, LimitRequest limitRequest) throws Throwable {
// 获得request对象
RequestAttributes ra = RequestContextHolder.getRequestAttributes();
ServletRequestAttributes sra = (ServletRequestAttributes) ra;
HttpServletRequest request = sra.getRequest();
// 获取Map对象, 如果没有则返回默认值
// 第一个参数是key, 第二个参数是默认值
ExpiringMap<String, Integer> uc = book.getOrDefault(request.getRequestURI(), ExpiringMap.builder().variableExpiration().build());
Integer uCount = uc.getOrDefault(request.getRemoteAddr(), 0);
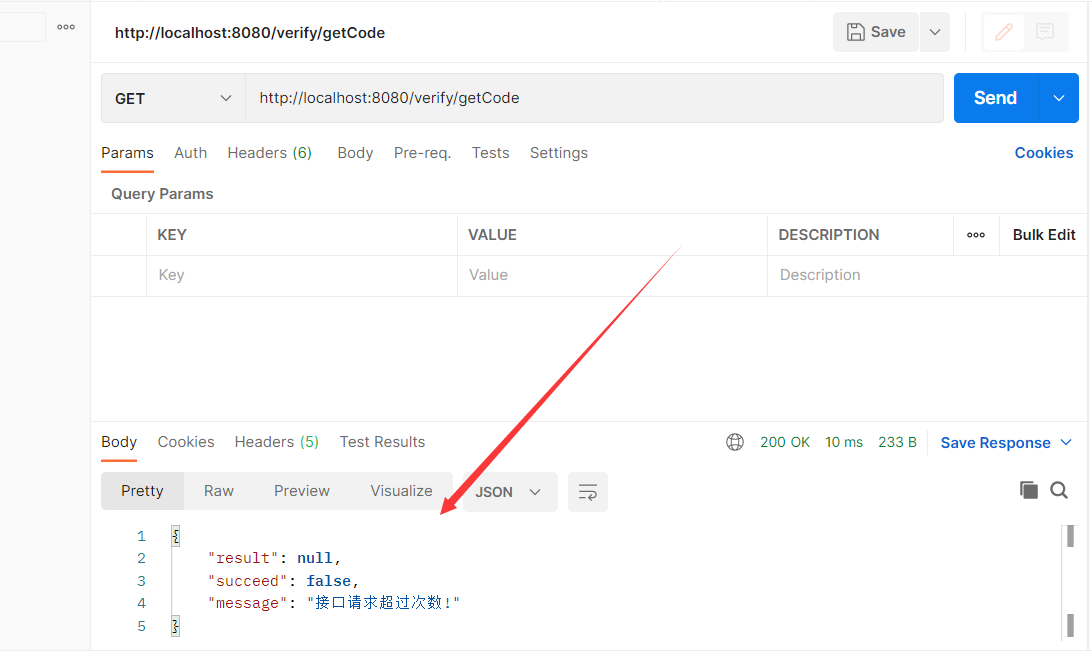
if (uCount >= limitRequest.count()) { // 超过次数,不执行目标方法
System.out.println("接口请求超过次数!");
throw new AppException("接口请求超过次数!");
} else if (uCount == 0) { // 第一次请求时,设置有效时间
//
uc.put(request.getRemoteAddr(), uCount + 1, ExpirationPolicy.CREATED, limitRequest.time(), TimeUnit.MILLISECONDS);
} else { // 未超过次数, 记录加一
uc.put(request.getRemoteAddr(), uCount + 1);
}
book.put(request.getRequestURI(), uc);
// result的值就是被拦截方法的返回值
Object result = pjp.proceed();
return result;
}
}为了捕获全局的异常抛出, 且符合restful规范我们加一个这个处理类:
handle包下面的全局异常类:
package org.cuit.epoch.handler;
import lombok.extern.log4j.Log4j2;
import org.cuit.epoch.exception.AppException;
import org.cuit.epoch.result.R;
import org.cuit.epoch.result.Result;
import org.springframework.web.bind.annotation.ControllerAdvice;
import org.springframework.web.bind.annotation.ExceptionHandler;
import org.springframework.web.bind.annotation.ResponseBody;
@ControllerAdvice
@Log4j2
public class GlobalExceptionHandler {
    @ExceptionHandler(Exception.class)
    @ResponseBody
    public Result error(Exception e) {
        log.error(e.getMessage());
        e.printStackTrace();
        return R.fail(e.getMessage());
    }
    @ExceptionHandler(AppException.class)
    @ResponseBody
    public Result error(AppException e) {
        log.error(e.getMessage());
        e.printStackTrace();
        return R.fail(e.getMessage());
    }
}application.yaml文件:
spring:
  cache:
    type:
      redis
  redis: #redis连接配置
    host: 自己redis的ip地址
    port: redis端口
    password: 密码
    jedis:
      pool:
        max-active: 8
        max-wait: -1ms
        max-idle: 500
        min-idle: 0
    lettuce: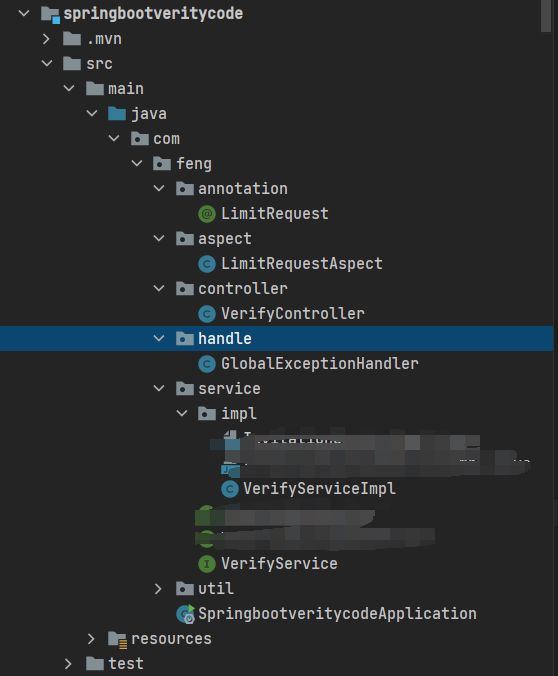
shutdown-timeout: 0ms最终项目结构如下:
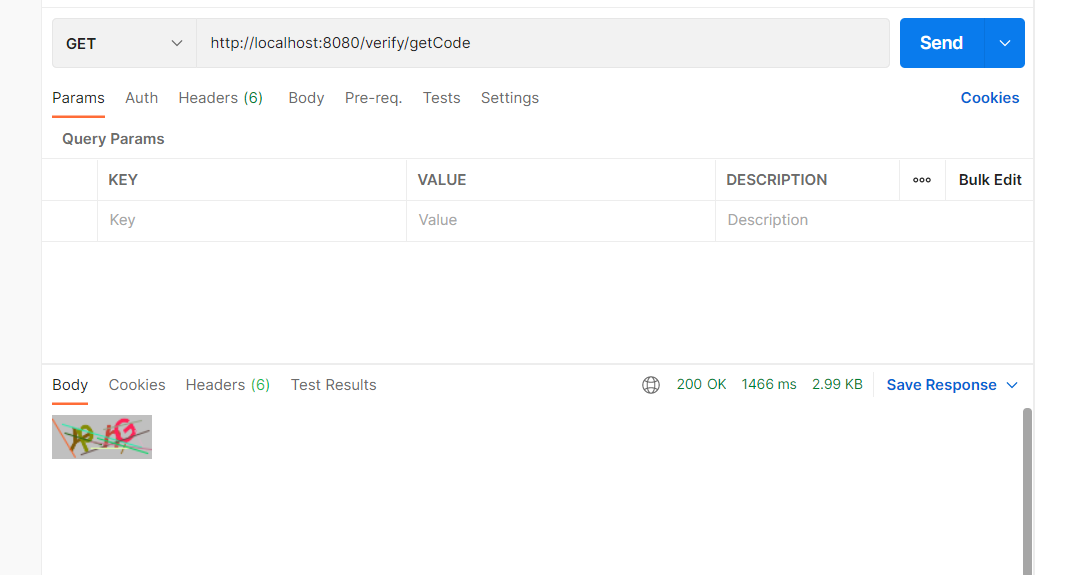
先得到一个验证码:
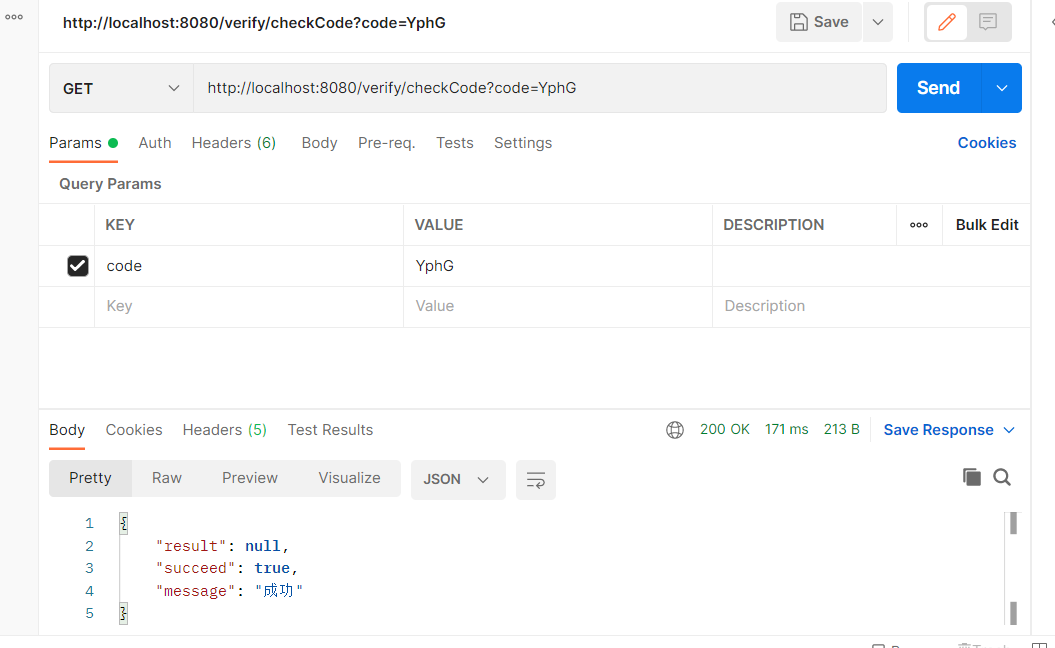
验证一下是否成功:
成功结果:
验证失败结果:
当请求在规定时间内的请求数超过规定的数量时或有报错:
以上是springboot图片验证码功能模块怎么实现的详细内容。更多信息请关注PHP中文网其他相关文章!

热AI工具

Undresser.AI Undress
人工智能驱动的应用程序,用于创建逼真的裸体照片

AI Clothes Remover
用于从照片中去除衣服的在线人工智能工具。

Undress AI Tool
免费脱衣服图片

Clothoff.io
AI脱衣机

AI Hentai Generator
免费生成ai无尽的。

热门文章
热工具

记事本++7.3.1
好用且免费的代码编辑器

SublimeText3汉化版
中文版,非常好用

禅工作室 13.0.1
功能强大的PHP集成开发环境

Dreamweaver CS6
视觉化网页开发工具

SublimeText3 Mac版
神级代码编辑软件(SublimeText3)
热门话题


 Springboot怎么集成Jasypt实现配置文件加密
Jun 01, 2023 am 08:55 AM
Springboot怎么集成Jasypt实现配置文件加密
Jun 01, 2023 am 08:55 AM
Jasypt介绍Jasypt是一个java库,它允许开发员以最少的努力为他/她的项目添加基本的加密功能,并且不需要对加密工作原理有深入的了解用于单向和双向加密的高安全性、基于标准的加密技术。加密密码,文本,数字,二进制文件...适合集成到基于Spring的应用程序中,开放API,用于任何JCE提供程序...添加如下依赖:com.github.ulisesbocchiojasypt-spring-boot-starter2.1.1Jasypt好处保护我们的系统安全,即使代码泄露,也可以保证数据源的
 SpringBoot怎么集成Redisson实现延迟队列
May 30, 2023 pm 02:40 PM
SpringBoot怎么集成Redisson实现延迟队列
May 30, 2023 pm 02:40 PM
使用场景1、下单成功,30分钟未支付。支付超时,自动取消订单2、订单签收,签收后7天未进行评价。订单超时未评价,系统默认好评3、下单成功,商家5分钟未接单,订单取消4、配送超时,推送短信提醒……对于延时比较长的场景、实时性不高的场景,我们可以采用任务调度的方式定时轮询处理。如:xxl-job今天我们采
 怎么在SpringBoot中使用Redis实现分布式锁
Jun 03, 2023 am 08:16 AM
怎么在SpringBoot中使用Redis实现分布式锁
Jun 03, 2023 am 08:16 AM
一、Redis实现分布式锁原理为什么需要分布式锁在聊分布式锁之前,有必要先解释一下,为什么需要分布式锁。与分布式锁相对就的是单机锁,我们在写多线程程序时,避免同时操作一个共享变量产生数据问题,通常会使用一把锁来互斥以保证共享变量的正确性,其使用范围是在同一个进程中。如果换做是多个进程,需要同时操作一个共享资源,如何互斥呢?现在的业务应用通常是微服务架构,这也意味着一个应用会部署多个进程,多个进程如果需要修改MySQL中的同一行记录,为了避免操作乱序导致脏数据,此时就需要引入分布式锁了。想要实现分
 springboot读取文件打成jar包后访问不到怎么解决
Jun 03, 2023 pm 04:38 PM
springboot读取文件打成jar包后访问不到怎么解决
Jun 03, 2023 pm 04:38 PM
springboot读取文件,打成jar包后访问不到最新开发出现一种情况,springboot打成jar包后读取不到文件,原因是打包之后,文件的虚拟路径是无效的,只能通过流去读取。文件在resources下publicvoidtest(){Listnames=newArrayList();InputStreamReaderread=null;try{ClassPathResourceresource=newClassPathResource("name.txt");Input
 SpringBoot与SpringMVC的比较及差别分析
Dec 29, 2023 am 11:02 AM
SpringBoot与SpringMVC的比较及差别分析
Dec 29, 2023 am 11:02 AM
SpringBoot和SpringMVC都是Java开发中常用的框架,但它们之间有一些明显的差异。本文将探究这两个框架的特点和用途,并对它们的差异进行比较。首先,我们来了解一下SpringBoot。SpringBoot是由Pivotal团队开发的,它旨在简化基于Spring框架的应用程序的创建和部署。它提供了一种快速、轻量级的方式来构建独立的、可执行
 Springboot+Mybatis-plus不使用SQL语句进行多表添加怎么实现
Jun 02, 2023 am 11:07 AM
Springboot+Mybatis-plus不使用SQL语句进行多表添加怎么实现
Jun 02, 2023 am 11:07 AM
在Springboot+Mybatis-plus不使用SQL语句进行多表添加操作我所遇到的问题准备工作在测试环境下模拟思维分解一下:创建出一个带有参数的BrandDTO对象模拟对后台传递参数我所遇到的问题我们都知道,在我们使用Mybatis-plus中进行多表操作是极其困难的,如果你不使用Mybatis-plus-join这一类的工具,你只能去配置对应的Mapper.xml文件,配置又臭又长的ResultMap,然后再去写对应的sql语句,这种方法虽然看上去很麻烦,但具有很高的灵活性,可以让我们
 SpringBoot怎么自定义Redis实现缓存序列化
Jun 03, 2023 am 11:32 AM
SpringBoot怎么自定义Redis实现缓存序列化
Jun 03, 2023 am 11:32 AM
1、自定义RedisTemplate1.1、RedisAPI默认序列化机制基于API的Redis缓存实现是使用RedisTemplate模板进行数据缓存操作的,这里打开RedisTemplate类,查看该类的源码信息publicclassRedisTemplateextendsRedisAccessorimplementsRedisOperations,BeanClassLoaderAware{//声明了key、value的各种序列化方式,初始值为空@NullableprivateRedisSe
 springboot怎么获取application.yml里值
Jun 03, 2023 pm 06:43 PM
springboot怎么获取application.yml里值
Jun 03, 2023 pm 06:43 PM
在项目中,很多时候需要用到一些配置信息,这些信息在测试环境和生产环境下可能会有不同的配置,后面根据实际业务情况有可能还需要再做修改。我们不能将这些配置在代码中写死,最好是写到配置文件中,比如可以把这些信息写到application.yml文件中。那么,怎么在代码里获取或者使用这个地址呢?有2个方法。方法一:我们可以通过@Value注解的${key}即可获取配置文件(application.yml)中和key对应的value值,这个方法适用于微服务比较少的情形方法二:在实际项目中,遇到业务繁琐,逻
