

Windows安装nginx1.10.1反向代理访问IIS网站的方法

首先去官网下载软件包,解压,路径最好不要有中文
nginx配置的路径问题
由于在windows下文件路径可以用”\”, 也可以用”\\”, 也可以用”/”作为路径做分隔符。但”\”最容易引发问题,所以要尽量避免使用。
不要添加path,否则会引发错误,config文件路径找不到
比如我解压在e盘
cmd命令定位到nginx.exe所在文件夹cd e:\worksoftware\nginx-1.10.1
然后执行,首先保证nginx.conf文件配置没问题
其实nginx最重要的和最主要的工作就是配置文件,其他没什么需要我们应用开发人员关注的,除非想修改底层源码.
nginx.conf配置如下:
#user nobody;
worker_processes 1;
#工作进程的个数,可以配置多个

#全局错误日志及pid文件
error_log /worksoftware/nginx-1.10.1/logs/error.log;
#error_log logs/error.log notice;
#error_log logs/error.log info;

pid  /worksoftware/nginx-1.10.1/logs/nginx.pid;


events {
 worker_connections 1024; #单个进程最大连接数(最大连接数=连接数*进程数)
}

#设定http服务器,利用它的反向代理功能提供负载均衡支持
http {
 include  mime.types; #设定配置文件位置,这里的conf是指nginx.conf所在的目录,也可以用绝对路径指定其他地方的配置文件
 default_type application/octet-stream; #默认类型-8进制文件流

 #设定日志格式
 #log_format main '$remote_addr - $remote_user [$time_local] "$request" '
 #     '$status $body_bytes_sent "$http_referer" '
 #     '"$http_user_agent" "$http_x_forwarded_for"';

 #设定访问日志
 #access_log /worksoftware/nginx-1.10.1/logs/access.log main;

 sendfile  on; #是否激活sendfile()函数,比默认模式更有效率
 #tcp_nopush  on; #将http响应头压缩到一个包中发送,仅在sendfile开启时才能配合使用

 #连接超时时间
 #keepalive_timeout 0;
 keepalive_timeout 65;

 gzip on; #启用gzip压缩

 #服务器的集群
 #设定负载均衡的服务器列表 支持多组的负载均衡,可以配置多个upstream 来服务于不同的server.
 #nginx 的 upstream 支持 几 种方式的分配
 #1)、轮询(默认) 每个请求按时间顺序逐一分配到不同的后端服务器,如果后端服务器down掉,能自动剔除。
 #2)、weight 指定轮询几率,weight和访问比率成正比,用于后端服务器性能不均的情况。 跟上面样,指定了权重。
 #3)、ip_hash 每个请求按访问ip的hash结果分配,这样每个访客固定访问一个后端服务器,可以解决session的问题。
 #4)、fair
 #5)、url_hash #urlhash

 #upstream imicrosoft.net
 #{
  #服务器集群名字
  #服务器配置 weight是权重的意思,权重越大,分配的概率越大。
  #server 192.98.12.60:1985 weight=3 max_fails=2 fail_timeout=30s;
  #server 192.98.12.42:8086 weight=3 max_fails=2 fail_timeout=30s;

  #weigth参数表示权值,权值越高被分配到的几率越大
  #1.down 表示单前的server暂时不参与负载
  #2.weight 默认为1.weight越大,负载的权重就越大。
  #3.backup: 其它所有的非backup机器down或者忙的时候,请求backup机器。所以这台机器压力会最轻。
  #本例是指在同一台服务器,多台服务器改变ip即可
 # server 127.0.0.1:8055 weight=4 down;
 # server 127.0.0.1:8010 weight=5 backup;
 #}


 upstream localhost
 {
  server 127.0.0.1:9000 weight=3 max_fails=2 fail_timeout=200s;
  server 127.0.0.1:8086 weight=5 max_fails=2 fail_timeout=200s;
 }


 #当前的nginx的配置,代理服务器的地址,即nginx安装的服务器地址、监听端口、默认地址,
 #设定虚拟主机,默认为监听80端口
 server
 {
  listen  9090; #侦听9090端口
  #对于server_name,如果需要将多个域名的请求进行反向代理,可以配置多个server_name来满足要求
  server_name localhost; #当前服务的域名

  charset utf8;
  #charset koi8-r;

  #设定本虚拟主机的访问日志
  #access_log logs/host.access.log main;


  #如果访问 /images/*, /js/*, /css/* 资源,则直接取本地文件,不用转发。
  #但如果文件较多效果不是太好。
  #location ~ .*\.(jpg|jpeg|gif|css|png|ico|html)$
  #{
  # expires 30d;
  # root /nginx-1.10.1;#root:
  # break;
  #}

  #对 "/" 启用负载均衡
  location / {

   root html;  #默认主页目录在nginx安装目录的html子目录

   index index.html index.htm index.aspx; #没有索引页时,罗列文件和子目录
   #proxy_pass http://www.imicrosoft.net; #跟载均衡服务器的upstream对应
   autoindex on; #没有索引页时,罗列文件和子目录

   #保留用户真实信息
   proxy_redirect off; #url不跳转
   proxy_set_header host $host;
   proxy_set_header x-real-ip $remote_addr;
   proxy_set_header x-forwarded-for $proxy_add_x_forwarded_for;
   #缓冲区代理缓冲用户端请求的最大字节数,可以理解为先保存到本地再传给用户
   # client_body_buffer_size 128k;
   # #跟后端服务器连接超时时间 发起握手等候响应超时时间
   # proxy_connect_timeout 12;
   # #连接成功后 等待后端服务器响应时间 其实已进入后端的排队之中等候处理
   # proxy_read_timeout 90;
   # #代理请求缓存区 这个缓存区间会保存用户的头信息一共nginx进行规则处理 一般只要能保存下头信息即可
   # proxy_send_timeout 90;
   # #同上 告诉nginx保存单个用的几个buffer最大用多大空间
   # proxy_buffer_size 4k;
   # proxy_buffers 4 32k;
   # #如果系统很忙的时候可以申请国内各大的proxy_buffers 官方推荐 *2
   # proxy_busy_buffers_size 64k;
   # #proxy 缓存临时文件的大小
   proxy_temp_file_write_size 64k;
   # proxy_next_upstream error timeout invalid_header http_500 http_503 http_404;
   proxy_max_temp_file_size 128m;
   #启动代理
   proxy_pass http://localhost;
   client_max_body_size 10m; #允许客户端请求的最大单个文件字节数
  }


  #示例一
  #location / {
  #  proxy_pass http://imicrosoft.net;
  #
  #  proxy_redirect default;
  #
  #  proxy_set_header host $host;
  #  proxy_set_header x-forwarded-for $proxy_add_x_forwarded_for;
  #}

  #示例二
  #location /tileservice {
  #  proxy_pass http://cluster/mongotileservice/tileservice;
  #  proxy_set_header host $host;
  #  proxy_set_header x-forwarded-for $proxy_add_x_forwarded_for;
  #}


  #error_page 404    /404.html;

  # redirect server error pages to the static page /50x.html
  #
  error_page 500 502 503 504 /50x.html;
  location = /50x.html {
   root html;
  }

  # proxy the php scripts to apache listening on 127.0.0.1:80
  #对 "/xxxxx.php" 启用负载均衡
  #location ~ \.php$ {
  # proxy_pass http://127.0.0.1;
  #}

  #location /baidu
  #{
  #proxy_pass http://www.google.com;
  #proxy_set_header host $host;
  #proxy_set_header x-forwarded-for $proxy_add_x_forwarded_for;
  #}

  # pass the php scripts to fastcgi server listening on 127.0.0.1:9000
  #
  #location ~ \.php$ {
  # root   html;
  # fastcgi_pass 127.0.0.1:9000;
  # fastcgi_index index.php;
  # fastcgi_param script_filename /scripts$fastcgi_script_name;
  # include  fastcgi_params;
  #}

  # deny access to .htaccess files, if apache's document root
  # concurs with nginx's one
  #
  #location ~ /\.ht {
  # deny all;
  #}
 }


 # another virtual host using mix of ip-, name-, and port-based configuration
 #
 #server {
 # listen  8000;
 # listen  somename:8080;
 # server_name somename alias another.alias;

 # location / {
 #  root html;
 #  index index.html index.htm;
 # }
 #}


 # https server
 #
 #server {
 # listen  443 ssl;
 # server_name localhost;

 # ssl_certificate  cert.pem;
 # ssl_certificate_key cert.key;

 # ssl_session_cache shared:ssl:1m;
 # ssl_session_timeout 5m;

 # ssl_ciphers high:!anull:!md5;
 # ssl_prefer_server_ciphers on;

 # location / {
 #  root html;
 #  index index.html index.htm;
 # }
 #}

}结果如图:


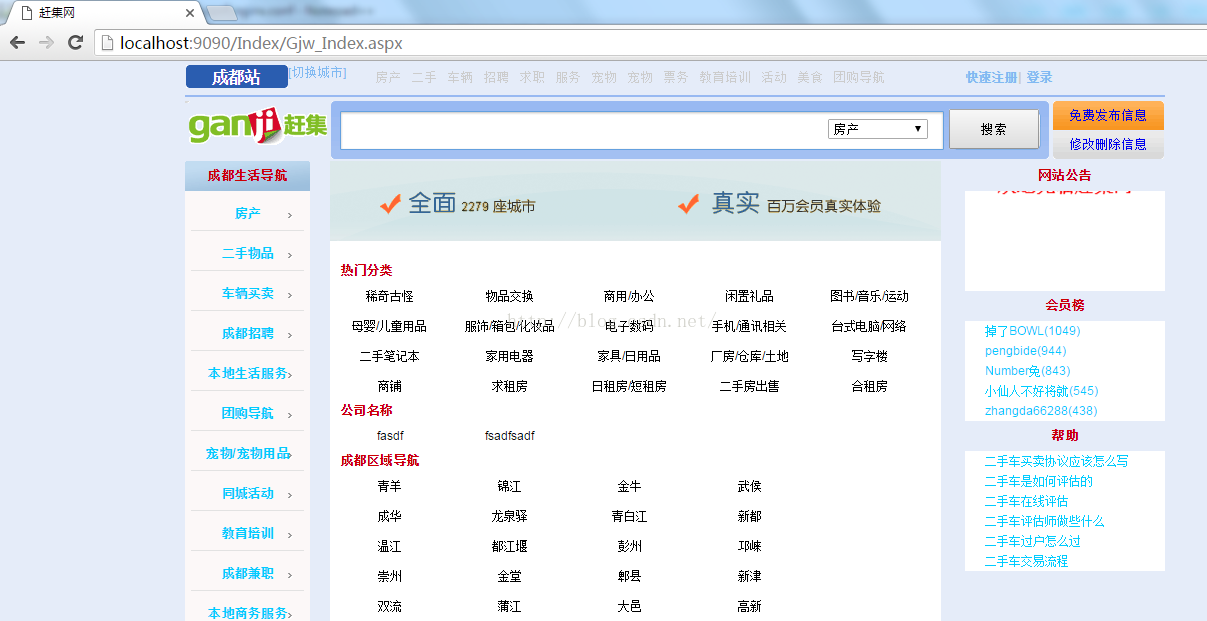
iis站点

以上是Windows安装nginx1.10.1反向代理访问IIS网站的方法的详细内容。更多信息请关注PHP中文网其他相关文章!

热AI工具

Undresser.AI Undress
人工智能驱动的应用程序,用于创建逼真的裸体照片

AI Clothes Remover
用于从照片中去除衣服的在线人工智能工具。

Undress AI Tool
免费脱衣服图片

Clothoff.io
AI脱衣机

AI Hentai Generator
免费生成ai无尽的。

热门文章
热工具

记事本++7.3.1
好用且免费的代码编辑器

SublimeText3汉化版
中文版,非常好用

禅工作室 13.0.1
功能强大的PHP集成开发环境

Dreamweaver CS6
视觉化网页开发工具

SublimeText3 Mac版
神级代码编辑软件(SublimeText3)
热门话题


 h5项目怎么运行
Apr 06, 2025 pm 12:21 PM
h5项目怎么运行
Apr 06, 2025 pm 12:21 PM
运行 H5 项目需要以下步骤:安装 Web 服务器、Node.js、开发工具等必要工具。搭建开发环境,创建项目文件夹、初始化项目、编写代码。启动开发服务器,使用命令行运行命令。在浏览器中预览项目,输入开发服务器 URL。发布项目,优化代码、部署项目、设置 Web 服务器配置。
 Gitee Pages静态网站部署失败:单个文件404错误如何排查和解决?
Apr 04, 2025 pm 11:54 PM
Gitee Pages静态网站部署失败:单个文件404错误如何排查和解决?
Apr 04, 2025 pm 11:54 PM
GiteePages静态网站部署失败:404错误排查与解决在使用Gitee...
 如何加快PS的载入速度?
Apr 06, 2025 pm 06:27 PM
如何加快PS的载入速度?
Apr 06, 2025 pm 06:27 PM
解决 Photoshop 启动慢的问题需要多管齐下,包括:升级硬件(内存、固态硬盘、CPU);卸载过时或不兼容的插件;定期清理系统垃圾和过多的后台程序;谨慎关闭无关紧要的程序;启动时避免打开大量文件。

 如何使用JavaScript区分关闭浏览器标签页和关闭整个浏览器?
Apr 04, 2025 pm 10:21 PM
如何使用JavaScript区分关闭浏览器标签页和关闭整个浏览器?
Apr 04, 2025 pm 10:21 PM
如何在浏览器上使用JavaScript区分关闭标签页和关闭整个浏览器?在日常使用浏览器的过程中,用户可能会同时�...
 可以在 Windows 7 上安装 mysql 吗
Apr 08, 2025 pm 03:21 PM
可以在 Windows 7 上安装 mysql 吗
Apr 08, 2025 pm 03:21 PM
是的,可以在 Windows 7 上安装 MySQL,虽然微软已停止支持 Windows 7,但 MySQL 仍兼容它。不过,安装过程中需要注意以下几点:下载适用于 Windows 的 MySQL 安装程序。选择合适的 MySQL 版本(社区版或企业版)。安装过程中选择适当的安装目录和字符集。设置 root 用户密码,并妥善保管。连接数据库进行测试。注意 Windows 7 上的兼容性问题和安全性问题,建议升级到受支持的操作系统。
 bootstrap导航栏怎么设置
Apr 07, 2025 pm 01:51 PM
bootstrap导航栏怎么设置
Apr 07, 2025 pm 01:51 PM
Bootstrap 提供了设置导航栏的简单指南:引入 Bootstrap 库创建导航栏容器添加品牌标识创建导航链接添加其他元素(可选)调整样式(可选)
 sftp.json配置后无法下载服务器文件的原因和解决方法是什么?
Apr 04, 2025 pm 06:54 PM
sftp.json配置后无法下载服务器文件的原因和解决方法是什么?
Apr 04, 2025 pm 06:54 PM
SFTP.json配置后无法下载服务器文件的解决方法在配置了sftp.json文件后,用户可能会遇到无法下载目标服务器文件...
