

nginx+redis怎么实现session共享

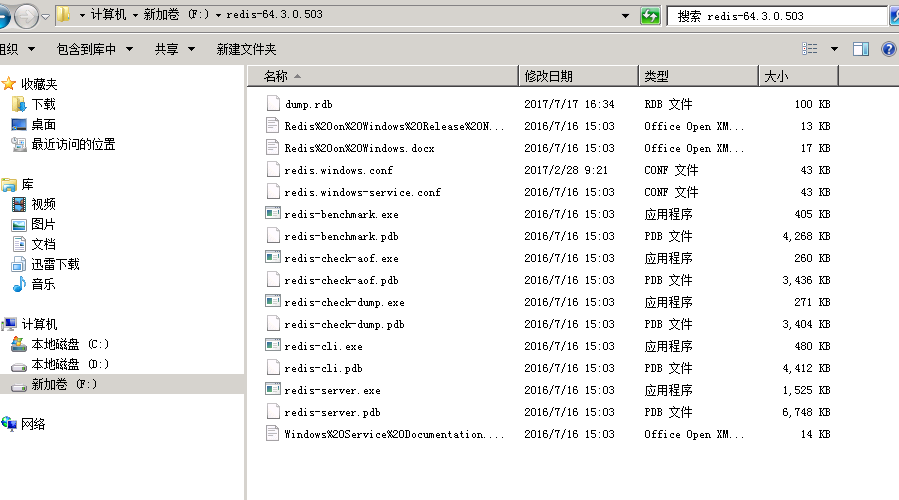
1.第一步是安装redis,我的服务器是windows的,下载的是免安装版本,解压以后就可以了,其目录如下。一开始redis是默认不需要密码,如果想要设置密码,可以进入redis.windows.conf文件下找到requirepass,删除前面的#号,在其后面便可以设置密码。
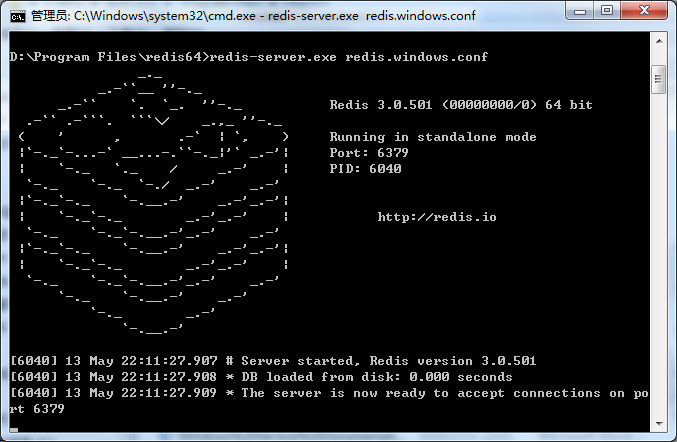
2.从cmd进入redis的根目录,键入如下指令:redis-server.exeredis.windows.conf。这样就可以启动redis了,如果启动成功,则会出现下面画面。当然还可以修改conf文件,加上密码。requirepass xxxxx
3.接下来我们就可以做一些配置工作,来实现session数据的全局缓存。
1)首先是添加jar包,如果你是maven项目,需要在pom.xml加入下面代码
<!-- redis -->
 <dependency>
  <groupid>org.springframework.session</groupid>
  <artifactid>spring-session-data-redis</artifactid>
  <version>1.3.1.release</version>
  <type>pom</type>
 </dependency>
如果不是maven项目,你需要加入下面这些jar包。

2)编写redis.properties,代码如下
redis_isopen:yes
#主机地址
redis_hostname=xxx.xxx.xxx.xxx
#端口
redis_port=6379
#密码
redis_password=xxxxxxxx
#连接超时时间
redis_timeout=200000
redis_maxidle:300
redis_maxactive:600
redis_maxwait:100000
redis_testonborrow:true
基本上与我们配置数据库的连接语句类似。
3)编写spring-redis.xml配置文件,这个文件配置关于redis的一些基本信息。
<?xml version="1.0" encoding="utf-8" standalone="no"?>
<beans xmlns="http://www.springframework.org/schema/beans"
 xmlns:context="http://www.springframework.org/schema/context" xmlns:tx="http://www.springframework.org/schema/tx"
 xmlns:util="http://www.springframework.org/schema/util" xmlns:xsi="http://www.w3.org/2001/xmlschema-instance"
 xsi:schemalocation="http://www.springframework.org/schema/beans http://www.springframework.org/schema/beans/spring-beans.xsd http://www.springframework.org/schema/context http://www.springframework.org/schema/context/spring-context.xsd http://www.springframework.org/schema/tx http://www.springframework.org/schema/tx/spring-tx.xsd http://www.springframework.org/schema/util http://www.springframework.org/schema/util/spring-util.xsd ">
 <!-- session设置 maxinactiveintervalinseconds为session的失效时间,单位为秒-->
 <bean
 class="org.springframework.session.data.redis.config.annotation.web.http.redishttpsessionconfiguration">
 <property name="maxinactiveintervalinseconds" value="3600"></property>
 </bean>
 <!-- redis连接池 -->
 <bean id="poolconfig" class="redis.clients.jedis.jedispoolconfig">
 <property name="maxidle" value="${redis_maxidle}" />
 <property name="testonborrow" value="${redis_testonborrow}" />
 </bean>
 <!-- redis连接工厂 -->
 <bean id="connectionfactory"
 class="org.springframework.data.redis.connection.jedis.jedisconnectionfactory">
 <property name="hostname" value="${redis_hostname}" />
 <property name="port" value="${redis_port}" />
 <property name="password" value="${redis_password}" />
 <property name="timeout" value="${redis_timeout}" />
 <property name="poolconfig" ref="poolconfig"></property>
 </bean>
</beans>4)在application.xml(spring的主配置文件)需要加入redis.properties配置文件的扫描,如下。
<!-- 读取redis参数配置 -->
 <bean id="propertyconfigurer"
 class="org.springframework.beans.factory.config.propertyplaceholderconfigurer">
 <property name="locations">
  <list>
  <value>/web-inf/classes/redis.properties</value>
  </list>
 </property>
 </bean>
5)在主配置文件中引入spring-redis.xml,如下。
<import resource="spring-redis.xml" />
6)在web.xml中,加入关于session的过滤器,只有这样session才会被redis所操纵。
<filter>
 <filter-name>springsessionrepositoryfilter</filter-name>
 <filter-class>org.springframework.web.filter.delegatingfilterproxy</filter-class>
 </filter>
 <filter-mapping>
 <filter-name>springsessionrepositoryfilter</filter-name>
 <url-pattern>/*</url-pattern>
 </filter-mapping>
这样以后,我们就实现了redis对session的管理。
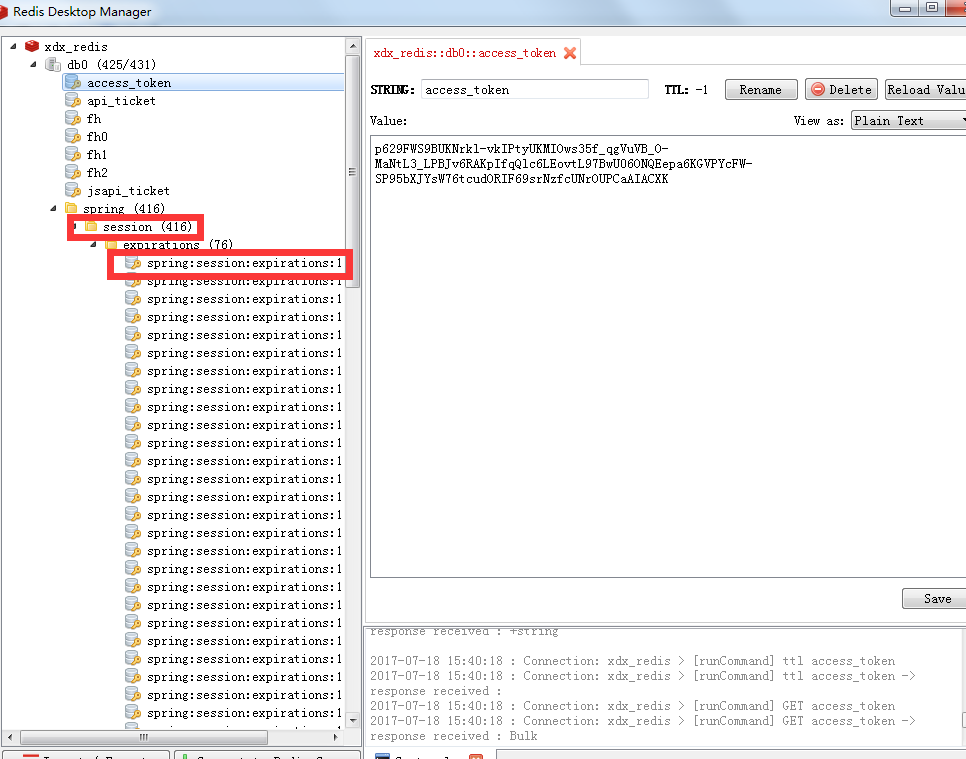
7)我们可以安装一个redis的客户端来查看里面的数据,叫做redis desktop manager。如下图,很好用,可以看到redis数据库中的数据。
ps.再退出的时候,需要这样写才不会出错。(ssh项目)
public string yipinexit(){
 iterator<string>keys=session.keyset().iterator();
 while(keys.hasnext()){
  string key=keys.next();
  session.remove(key);
 }
 return "yipinexit";
}以上是nginx+redis怎么实现session共享的详细内容。更多信息请关注PHP中文网其他相关文章!

热AI工具

Undresser.AI Undress
人工智能驱动的应用程序,用于创建逼真的裸体照片

AI Clothes Remover
用于从照片中去除衣服的在线人工智能工具。

Undress AI Tool
免费脱衣服图片

Clothoff.io
AI脱衣机

Video Face Swap
使用我们完全免费的人工智能换脸工具轻松在任何视频中换脸!

热门文章
热工具

记事本++7.3.1
好用且免费的代码编辑器

SublimeText3汉化版
中文版,非常好用

禅工作室 13.0.1
功能强大的PHP集成开发环境

Dreamweaver CS6
视觉化网页开发工具

SublimeText3 Mac版
神级代码编辑软件(SublimeText3)


 docker容器名称怎么查
Apr 15, 2025 pm 12:21 PM
docker容器名称怎么查
Apr 15, 2025 pm 12:21 PM
可以通过以下步骤查询 Docker 容器名称:列出所有容器(docker ps)。筛选容器列表(使用 grep 命令)。获取容器名称(位于 "NAMES" 列中)。
 nginx在windows中怎么配置
Apr 14, 2025 pm 12:57 PM
nginx在windows中怎么配置
Apr 14, 2025 pm 12:57 PM
如何在 Windows 中配置 Nginx?安装 Nginx 并创建虚拟主机配置。修改主配置文件并包含虚拟主机配置。启动或重新加载 Nginx。测试配置并查看网站。选择性启用 SSL 并配置 SSL 证书。选择性设置防火墙允许 80 和 443 端口流量。
 centos redis如何配置Lua脚本执行时间
Apr 14, 2025 pm 02:12 PM
centos redis如何配置Lua脚本执行时间
Apr 14, 2025 pm 02:12 PM
在CentOS系统上,您可以通过修改Redis配置文件或使用Redis命令来限制Lua脚本的执行时间,从而防止恶意脚本占用过多资源。方法一:修改Redis配置文件定位Redis配置文件:Redis配置文件通常位于/etc/redis/redis.conf。编辑配置文件:使用文本编辑器(例如vi或nano)打开配置文件:sudovi/etc/redis/redis.conf设置Lua脚本执行时间限制:在配置文件中添加或修改以下行,设置Lua脚本的最大执行时间(单位:毫秒)
 怎么查看nginx是否启动
Apr 14, 2025 pm 01:03 PM
怎么查看nginx是否启动
Apr 14, 2025 pm 01:03 PM
确认 Nginx 是否启动的方法:1. 使用命令行:systemctl status nginx(Linux/Unix)、netstat -ano | findstr 80(Windows);2. 检查端口 80 是否开放;3. 查看系统日志中 Nginx 启动消息;4. 使用第三方工具,如 Nagios、Zabbix、Icinga。
 docker怎么创建容器
Apr 15, 2025 pm 12:18 PM
docker怎么创建容器
Apr 15, 2025 pm 12:18 PM
在 Docker 中创建容器: 1. 拉取镜像: docker pull [镜像名] 2. 创建容器: docker run [选项] [镜像名] [命令] 3. 启动容器: docker start [容器名]
 docker怎么启动容器
Apr 15, 2025 pm 12:27 PM
docker怎么启动容器
Apr 15, 2025 pm 12:27 PM
Docker 容器启动步骤:拉取容器镜像:运行 "docker pull [镜像名称]"。创建容器:使用 "docker create [选项] [镜像名称] [命令和参数]"。启动容器:执行 "docker start [容器名称或 ID]"。检查容器状态:通过 "docker ps" 验证容器是否正在运行。
 怎么启动nginx服务器
Apr 14, 2025 pm 12:27 PM
怎么启动nginx服务器
Apr 14, 2025 pm 12:27 PM
启动 Nginx 服务器需要按照不同操作系统采取不同的步骤:Linux/Unix 系统:安装 Nginx 软件包(例如使用 apt-get 或 yum)。使用 systemctl 启动 Nginx 服务(例如 sudo systemctl start nginx)。Windows 系统:下载并安装 Windows 二进制文件。使用 nginx.exe 可执行文件启动 Nginx(例如 nginx.exe -c conf\nginx.conf)。无论使用哪种操作系统,您都可以通过访问服务器 IP
 nginx怎么启动
Apr 14, 2025 pm 01:06 PM
nginx怎么启动
Apr 14, 2025 pm 01:06 PM
问题:如何启动 Nginx?答案:安装 Nginx启动 Nginx验证 Nginx 是否已启动探索其他启动选项自动启动 Nginx
