

CentOS7安装Nginx并配置自动启动实例分析

1、官网下载安装包
选择适合linux的版本,这里选择最新的版本,下载到本地后上传到服务器或者centos下直接wget命令下载。
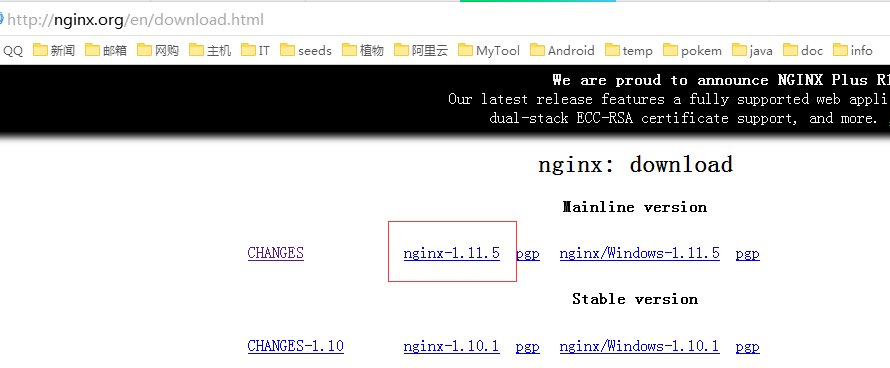
切换到/usr/local目录,下载软件包
# cd /usr/local
# wget http://nginx.org/download/nginx-1.11.5.tar.gz
2、安装nginx
先执行以下命令,安装nginx依赖库,如果缺少依赖库,可能会安装失败,具体可以参考文章后面的错误提示信息。
# yum install gcc-c++
# yum install pcre
# yum install pcre-devel
# yum install zlib
# yum install zlib-devel
# yum install openssl
# yum install openssl-devel
解压安装包
# tar -zxvf nginx-1.11.5.tar.gz
nginx被解压到了/usr/local/nginx-1.11.5 目录下(不要把压缩包解压到/usr/local/nginx目录下,或者将解压后的目录重命名为nginx,因为nginx会默认安装到/usr/local/nginx目录下),切换到nginx-1.11.5/目录
# cd /usr/local/nginx-1.11.5/
执行# ./configure
# ./configure
该操作会检测当前系统环境,以确保能成功安装nginx,执行该操作后可能会出现以下几种提示:
checking for os
+ linux 3.10.0-123.el7.x86_64 x86_64
checking for c compiler ... not found
./configure: error: c compiler cc is not found
如果出现以上错误提示信息,执行yum install gcc-c++安装gcc,
./configure: error: the http rewrite module requires the pcre library.
you can either disable the module by using --without-http_rewrite_module
option, or install the pcre library into the system, or build the pcre library
statically from the source with nginx by using --with-pcre=
如果出现上面提示,表示缺少pcre库
./configure: error: the http gzip module requires the zlib library.
you can either disable the module by using --without-http_gzip_module
option, or install the zlib library into the system, or build the zlib library
statically from the source with nginx by using --with-zlib=
如果出现以上提示,表示缺少zlib库
如果没有出现./configure: error提示,表示当前环境可以安装nginx,执行make和make install编译nginx
# make
# make install
没有出错的话,表示nginx已经成功安装完成,默认安装位置为/usr/local/nginx,之前的/usr/local/nginx-1.11.5/可以删除掉了。
如果出现cp: 'conf/koi-win' and '/usr/local/nginx/conf/koi-win' are the same file,可能是你把安装包解压到了/usr/local/nginx目录,解决办法是将该目录重命名为其他名称后再执行make,make install.
3、配置nginx开机启动
切换到/lib/systemd/system/目录,创建nginx.service文件vim nginx.service
# cd /lib/systemd/system/
# vim nginx.service
文件内容如下:
[unit]
description=nginx
after=network.target

[service]
type=forking
execstart=/usr/local/nginx/sbin/nginx
execreload=/usr/local/nginx/sbin/nginx reload
execstop=/usr/local/nginx/sbin/nginx quit
privatetmp=true

[install]
wantedby=multi-user.target
退出并保存文件,执行systemctl enable nginx.service使nginx开机启动
# systemctl enable nginx.service
systemctl start nginx.service 启动nginx
systemctl stop nginx.service 结束nginx
systemctl restart nginx.service 重启nginx
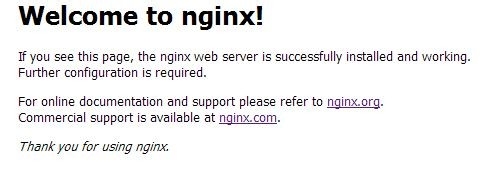
4、验证是否安装成功
输入http://服务器ip/ 如果能看到nginx的界面,就表示安装成功了
以上是CentOS7安装Nginx并配置自动启动实例分析的详细内容。更多信息请关注PHP中文网其他相关文章!

热AI工具

Undresser.AI Undress
人工智能驱动的应用程序,用于创建逼真的裸体照片

AI Clothes Remover
用于从照片中去除衣服的在线人工智能工具。

Undress AI Tool
免费脱衣服图片

Clothoff.io
AI脱衣机

Video Face Swap
使用我们完全免费的人工智能换脸工具轻松在任何视频中换脸!

热门文章
热工具

记事本++7.3.1
好用且免费的代码编辑器

SublimeText3汉化版
中文版,非常好用

禅工作室 13.0.1
功能强大的PHP集成开发环境

Dreamweaver CS6
视觉化网页开发工具

SublimeText3 Mac版
神级代码编辑软件(SublimeText3)


 nginx怎么配置云服务器域名
Apr 14, 2025 pm 12:18 PM
nginx怎么配置云服务器域名
Apr 14, 2025 pm 12:18 PM
在云服务器上配置 Nginx 域名的方法:创建 A 记录,指向云服务器的公共 IP 地址。在 Nginx 配置文件中添加虚拟主机块,指定侦听端口、域名和网站根目录。重启 Nginx 以应用更改。访问域名测试配置。其他注意事项:安装 SSL 证书启用 HTTPS、确保防火墙允许 80 端口流量、等待 DNS 解析生效。
 docker容器名称怎么查
Apr 15, 2025 pm 12:21 PM
docker容器名称怎么查
Apr 15, 2025 pm 12:21 PM
可以通过以下步骤查询 Docker 容器名称:列出所有容器(docker ps)。筛选容器列表(使用 grep 命令)。获取容器名称(位于 "NAMES" 列中)。
 怎么查看nginx是否启动
Apr 14, 2025 pm 01:03 PM
怎么查看nginx是否启动
Apr 14, 2025 pm 01:03 PM
确认 Nginx 是否启动的方法:1. 使用命令行:systemctl status nginx(Linux/Unix)、netstat -ano | findstr 80(Windows);2. 检查端口 80 是否开放;3. 查看系统日志中 Nginx 启动消息;4. 使用第三方工具,如 Nagios、Zabbix、Icinga。
 nginx在windows中怎么配置
Apr 14, 2025 pm 12:57 PM
nginx在windows中怎么配置
Apr 14, 2025 pm 12:57 PM
如何在 Windows 中配置 Nginx?安装 Nginx 并创建虚拟主机配置。修改主配置文件并包含虚拟主机配置。启动或重新加载 Nginx。测试配置并查看网站。选择性启用 SSL 并配置 SSL 证书。选择性设置防火墙允许 80 和 443 端口流量。
 nginx怎么查版本
Apr 14, 2025 am 11:57 AM
nginx怎么查版本
Apr 14, 2025 am 11:57 AM
可以查询 Nginx 版本的方法有:使用 nginx -v 命令;查看 nginx.conf 文件中的 version 指令;打开 Nginx 错误页,查看页面的标题。
 docker怎么启动容器
Apr 15, 2025 pm 12:27 PM
docker怎么启动容器
Apr 15, 2025 pm 12:27 PM
Docker 容器启动步骤:拉取容器镜像:运行 "docker pull [镜像名称]"。创建容器:使用 "docker create [选项] [镜像名称] [命令和参数]"。启动容器:执行 "docker start [容器名称或 ID]"。检查容器状态:通过 "docker ps" 验证容器是否正在运行。
 怎么启动nginx服务器
Apr 14, 2025 pm 12:27 PM
怎么启动nginx服务器
Apr 14, 2025 pm 12:27 PM
启动 Nginx 服务器需要按照不同操作系统采取不同的步骤:Linux/Unix 系统:安装 Nginx 软件包(例如使用 apt-get 或 yum)。使用 systemctl 启动 Nginx 服务(例如 sudo systemctl start nginx)。Windows 系统:下载并安装 Windows 二进制文件。使用 nginx.exe 可执行文件启动 Nginx(例如 nginx.exe -c conf\nginx.conf)。无论使用哪种操作系统,您都可以通过访问服务器 IP
 docker怎么创建容器
Apr 15, 2025 pm 12:18 PM
docker怎么创建容器
Apr 15, 2025 pm 12:18 PM
在 Docker 中创建容器: 1. 拉取镜像: docker pull [镜像名] 2. 创建容器: docker run [选项] [镜像名] [命令] 3. 启动容器: docker start [容器名]
