

如何使用CSS使div标签的高度与浏览器窗口的高度相等?

When working on web development projects, there are often scenarios where you need to give a div tag the full height of the browser window. This can be particularly useful when creating full-page layouts, hero sections, or elements that need to span the entire vertical space.
However, achieving this desired effect using CSS can be a bit tricky due to the nature of the CSS Box Model and the default behavior of height properties.
在本文中,我们将探讨使用CSS给div标签设置100%浏览器窗口高度的不同技术。我们将讨论各种CSS方法,并为每种技术提供实际的代码示例。
使用 Height: 100%
One approach to giving a div tag 100% height is by using the height: 100% property. However, it's important to note that this approach comes with certain challenges and limitations.
通过在div元素上设置height: 100%,您正在指示它占用父元素高度的100%。当父元素在CSS中明确定义了固定高度时,这种方法效果很好。然而,当涉及到浏览器窗口本身时,html和body元素(div标签的父元素)默认情况下没有固定高度。
为了使div标签填充整个浏览器窗口的高度,您需要确保父元素(html和body)的高度为100%。您可以通过应用以下CSS来实现此目的<!DOCTYPE html>
<html>
<head>
<style>
html, body {
height: 100%;
margin: 0;
padding: 0;
}
.container {
height: 100%;
background-color: lightgray;
display: flex;
align-items: center;
justify-content: center;
}
.content {
width: 300px;
height: 200px;
background-color: white;
border: 1px solid gray;
}
</style>
</head>
<body>
<div class="container">
<div class="content">
<!-- Content goes here -->
</div>
</div>
</body>
</html>
一旦父元素的高度设置为100%,在目标div标签上设置height: 100%将使其扩展以填充整个浏览器窗口的高度。
然而,在使用这种方法时,有几件事需要考虑 −
滚动− 如果div内的内容超过浏览器窗口的高度,将会出现滚动条以允许滚动内容。
Nested Elements − If the div tag is nested within other elements with percentage-based heights, you need to ensure that all the parent elements have a height of 100% for the approach to work correctly.
Compatibility − Older versions of Internet Explorer (IE) may not support the height: 100% approach correctly, so it's important to test your implementation across different browsers.
虽然height: 100%的方法在某些情况下可以是一个简单的解决方案,但它也有其局限性,并可能需要额外的考虑。在接下来的几节中,我们将探讨提供更灵活性和更好的浏览器支持的替代技术。
Technique 1: Using Height: 100vh
另一种将 div 标签的高度设置为浏览器窗口的 100% 的技术是使用 height: 100vh 属性。vh 单位表示视口高度的百分比。
By setting height: 100vh on a div element, you're instructing it to take up 100% of the height of the viewport, regardless of its parent elements. This approach provides a more straightforward solution without the need to set the parent elements' height explicitly.
Example
这里是一个完整的代码片段,演示了这个技术 -
<!DOCTYPE html>
<html>
<head>
   <style>
      .container {
         height: 100vh;
         background-color: lightgray;
         display: flex;
         align-items: center;
         justify-content: center;
      }
      .content {
         width: 300px;
         height: 200px;
         background-color: white;
         border: 1px solid gray;
      }
   </style>
</head>
<body>
   <div class="container">
      <div class="content">
         <!-- Content goes here -->
      </div>
   </div>
</body>
</html>
在这段代码片段中,我们有一个与之前类似的HTML结构,一个父div具有"class"为"container"的类,一个目标div具有"class"为"content"的类。应用CSS样式以实现所需效果。
关键区别在于我们在“container”类上设置了height: 100vh。这使得容器div扩展到视口的完整高度。内部的“content”div继承了高度,也会拉伸以填满整个视口的高度。
By using the height: 100vh approach, you can easily achieve a full-height div without explicitly setting the height of parent elements.
技巧2:使用Flexbox
Flexbox是一个强大的CSS布局模块,它提供了一种灵活的方式来分布和对齐容器内的元素。它还可以用于实现div标签的100%高度。
By utilizing the Flexbox properties, we can create a container that expands to fill the available vertical space. Here's a complete code snippet that demonstrates this technique −
Example
<!DOCTYPE html>
<html>
<head>
   <style>
      .container {
         display: flex;
         flex-direction: column;
         height: 100vh;
         background-color: lightgray;
      }
      .content {
         flex-grow: 1;
         background-color: white;
         border: 1px solid gray;
         margin: 20px;
      }
   </style>
</head>
<body>
   <div class="container">
      <div class="content">
         <!-- Content goes here -->
      </div>
   </div>
</body>
</html>
In this code snippet, we have a parent div element with a class of "container" and a child div with a class of "content". The CSS styles are applied to utilize Flexbox for achieving 100% height.
通过在 "container" 类上设置 display: flex,我们创建了一个 Flexbox 容器。添加 flex-direction: column 可以确保子元素垂直堆叠。height: 100vh 属性使容器扩展以填充整个视口的高度。
To make the "content" div take up the remaining vertical space, we set flex-grow: 1. This instructs the "content" element to grow and fill the available space within the Flexbox container.
技巧3:使用CSS Grid
CSS Grid is another powerful layout module that allows you to create complex grid-based layouts with ease. It can also be leveraged to achieve 100% height for a div tag.
By utilizing CSS Grid, we can create a grid container that expands to fill the available vertical space. Here's a complete code snippet that demonstrates this technique −
Example
<!DOCTYPE html>
<html>
<head>
   <style>
      .container {
         display: grid;
         grid-template-rows: 1fr;
         height: 100vh;
         background-color: lightgray;
      }
      .content {
         background-color: white;
         border: 1px solid gray;
         margin: 20px;
      }
   </style>
</head>
<body>
   <div class="container">
      <div class="content">
         <!-- Content goes here -->
      </div>
   </div>
</body>
</html>
In this code snippet, we have a parent div element with a class of "container" and a child div with a class of "content". The CSS styles are applied to utilize CSS Grid for achieving 100% height.
By setting display: grid on the "container" class, we create a CSS Grid container. The grid-template-rows: 1fr property sets the row template to 1fr, which means the available space is distributed evenly among the rows. This ensures that the "content" div takes up the full height of the container.
The height: 100vh property makes the container expand to fill the full height of the viewport.
技巧4:使用绝对定位
Another technique to give a div tag 100% height of the browser window is by using absolute positioning. By positioning the div element absolutely and setting its top, bottom, left, and right properties to 0, we can make it expand to fill the entire height of the viewport.
Example
这是一个完整的示例代码片段,演示了这个技术 −
<!DOCTYPE html>
<html>
<head>
   <style>
      .container {
         position: relative;
         height: 100vh;
         background-color: lightgray;
      }
      .content {
         position: absolute;
         top: 0;
         bottom: 0;
         left: 0;
         right: 0;
         background-color: white;
         border: 1px solid gray;
         margin: 20px;
      }
   </style>
</head>
<body>
   <div class="container">
      <div class="content">
         <!-- Content goes here -->
      </div>
   </div>
</body>
</html>
在这段代码片段中,我们有一个class为"container"的父div元素和一个class为"content"的子div元素。CSS样式被应用以利用绝对定位来实现100%的高度。
通过在"container"类上设置position: relative,我们为子div建立了一个定位上下文。这使我们能够将"content" div绝对定位相对于其父元素。
属性 top: 0, bottom: 0, left: 0 和 right: 0 将 "content" div 定位在其父元素的顶部、底部、左侧和右侧边缘。这将导致它拉伸并填充容器的整个高度。
Technique 5: 使用 Flexbox 和 Overflow
在某些情况下,您可能会遇到内容超过视口高度的情况。在这种情况下,您可以使用Flexbox和overflow属性的组合,以确保div保持100%的高度,同时允许溢出内容滚动。
示例
Here's a complete running example snippet that demonstrates this technique −
<!DOCTYPE html>
<html>
<head>
   <style>
      .container {
         display: flex;
         flex-direction: column;
         height: 100vh;
         background-color: lightgray;
      }
      .content {
         flex-grow: 1;
         background-color: white;
         border: 1px solid gray;
         margin: 20px;
         overflow: auto;
      }
   </style>
</head>
<body>
   <div class="container">
      <div class="content">
         <!-- Content goes here -->
      </div>
   </div>
</body>
</html>
In this code snippet, we have a parent div element with a class of "container" and a child div with a class of "content". The CSS styles are applied to utilize Flexbox and handle overflow.
Similar to Technique 2, we set display: flex on the "container" class to create a Flexbox container. The flex-direction: column property ensures that the child elements are stacked vertically.
通过在“content”类上设置flex-grow: 1,div会扩展以占据容器中剩余的垂直空间。此外,如果内容超过div的高度,我们使用overflow: auto来启用内容的垂直滚动。
Conclusion
Achieving a 100% height for a
Each technique offers its advantages and may be more suitable depending on the specific requirements of your project. It's important to consider factors such as content overflow and browser compatibility when choosing the appropriate approach.
通过理解和实施这些技术,您可以确保您的以上是如何使用CSS使div标签的高度与浏览器窗口的高度相等?的详细内容。更多信息请关注PHP中文网其他相关文章!

热AI工具

Undresser.AI Undress
人工智能驱动的应用程序,用于创建逼真的裸体照片

AI Clothes Remover
用于从照片中去除衣服的在线人工智能工具。

Undress AI Tool
免费脱衣服图片

Clothoff.io
AI脱衣机

AI Hentai Generator
免费生成ai无尽的。

热门文章
热工具

记事本++7.3.1
好用且免费的代码编辑器

SublimeText3汉化版
中文版,非常好用

禅工作室 13.0.1
功能强大的PHP集成开发环境

Dreamweaver CS6
视觉化网页开发工具

SublimeText3 Mac版
神级代码编辑软件(SublimeText3)


 vue中placeholder是什么意思
May 07, 2024 am 09:57 AM
vue中placeholder是什么意思
May 07, 2024 am 09:57 AM
在 Vue.js 中,placeholder 属性指定输入元素的占位符文本,当用户未输入内容时显示,提供输入提示或示例,提高表单可访问性。其用法为在输入元素中设置 placeholder 属性,并可使用 CSS 自定义外观。最佳实践包括与输入相关、简短清晰、避免默认文本,并考虑可访问性。
 js中span是什么意思
May 06, 2024 am 11:42 AM
js中span是什么意思
May 06, 2024 am 11:42 AM
span 标签可为文本添加样式、属性或行为,用于:添加样式,如颜色、字体大小。设置属性,如 id、class 等。关联行为,如点击、悬停等。标记文本,以便进一步处理或引用。
 js中rem是什么意思
May 06, 2024 am 11:30 AM
js中rem是什么意思
May 06, 2024 am 11:30 AM
CSS 中的 REM 是一种相对于根元素(html)字体大小的相对单位。它具有以下特点:相对根元素字体大小,不受父元素影响。当根元素字体大小改变时,使用 REM 的元素也会相应调整。可用于任何 CSS 属性。使用 REM 的优点包括:响应性:保持不同设备和屏幕大小上的文本可读性。一致性:确保整个网站字体大小一致。可扩展性:通过调整根元素字体大小轻松更改全局字体大小。
 vue中引入图片的方法
May 02, 2024 pm 10:48 PM
vue中引入图片的方法
May 02, 2024 pm 10:48 PM
Vue 中引入图片有五种方法:通过 URL、require 函数、静态文件、v-bind 指令和 CSS 背景图片。可以在 Vue 的计算属性或侦听器中处理动态图片,并使用打包工具优化图片加载。确保路径正确,否则会显示加载错误。
 js中什么是节点
May 07, 2024 pm 09:06 PM
js中什么是节点
May 07, 2024 pm 09:06 PM
节点是 JavaScript DOM 中表示 HTML 元素的实体。它们代表页面中的特定元素,可用于访问和操作该元素。常见的节点类型包括元素节点、文本节点、注释节点和文档节点。通过 DOM 方法(如 getElementById()),可以访问节点并对其进行操作,包括修改属性、添加/移除子节点、插入/替换节点和克隆节点。节点遍历有助于在 DOM 结构中导航。节点在动态创建页面内容、事件处理、动画和数据绑定方面非常有用。
 浏览器插件是什么语言写的
May 08, 2024 pm 09:36 PM
浏览器插件是什么语言写的
May 08, 2024 pm 09:36 PM
浏览器插件通常使用以下语言编写:前端语言:JavaScript、HTML、CSS后端语言:C++、Rust、WebAssembly其他语言:Python、Java
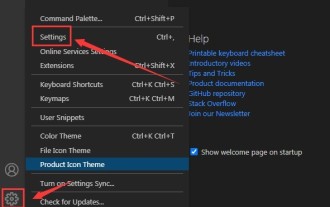 vscode怎么设置未知属性 vscode设置未知属性方法
May 09, 2024 pm 02:43 PM
vscode怎么设置未知属性 vscode设置未知属性方法
May 09, 2024 pm 02:43 PM
1.首先,打开左下角的设置图标,点击settings选项2.随后,在跳转的窗口中找到css栏目3.最后,将unknownproperties菜单中的下拉选项改为error按钮即可
 vue中的ref和id是干什么的
May 02, 2024 pm 08:42 PM
vue中的ref和id是干什么的
May 02, 2024 pm 08:42 PM
Vue.js 中,ref 用于 JavaScript 引用 DOM 元素(可访问子组件和 DOM 元素本身),而 id 用于设置 HTML id 属性(可用于 CSS 样式、HTML 标记和 JavaScript 查找)。
