使用Magento进行自定义布局和模板设计
在本系列的第一部分中,我们学习了 Magento 模块开发的基础知识,包括 Magento 目录结构、自定义模块结构,并创建了一个基本的“Hello World”模块,以了解控制器如何在 Magento 中工作。
在本文中,我们将学习如何创建块和布局文件。具体来说,我们将了解布局文件和块文件在 Magento 中如何工作,并且我们将了解布局文件的渲染。
正在寻找快速解决方案?
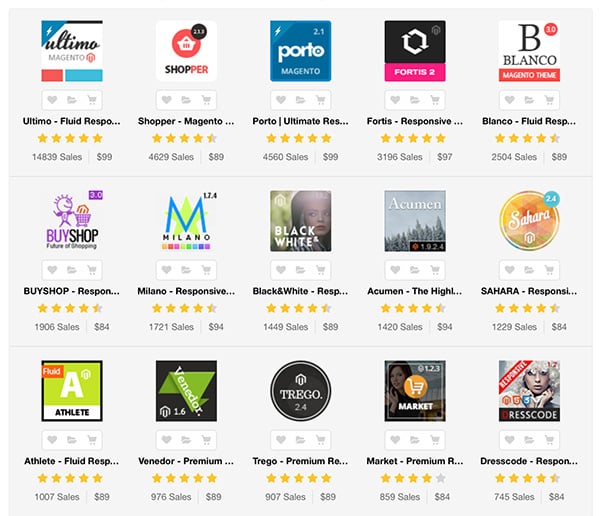
如果您正在寻找快速解决方案,Envato Market 上有大量 Magento 主题和模板。这是为您的项目快速构建高质量低多边形项目集合的好方法。

但是,继续教程吧!首先,我们将了解布局文件和块文件是什么以及它们在 Magento 中渲染前端页面时如何有用,然后我们将了解如何将它们包含在我们的自定义模块中。
什么是布局文件?
顾名思义,布局文件在渲染 Magento 的首页时非常有用。布局文件是 XML 文件,位于应用 > 设计 > 前端 > 界面 > 主题 > 布局 中。 在这里,您可以看到任何给定模块都有许多布局文件。每个 Magento 模块都有自己的布局文件,就像客户模块有 customer.xmlcustomer.xml 布局文件一样,目录模块有 catalog.xml 布局文件一样,
目录模块有 catalog.xml
布局文件等。这些布局文件包含结构块和内容块customer.xml 我>文件。在这里,所有块都围绕主 <layout></layout> 标记。您可以看到不同的 <tag></tag>。
如果您想知道为什么 Magento 需要这些块,您可以在本系列的第一部分中了解更多信息。
让我们深入研究布局文件
<customer_account_create></customer_account_create>让我们通过一个示例来深入了解布局文件。转到应用 > 设计 > 前端 > 基础 > 布局 并打开 customer.xml
<default></default>我>文件。在这里,所有块都围绕主 <layout></layout>
标记。您可以看到不同的 <tag></tag> 其中包含特定块。
请参阅以下代码片段:
<!--
New customer registration
-->

    <customer_account_create translate="label">
        <label>Customer Account Registration Form</label>
        <!-- Mage_Customer -->
        <remove name="right"/>
        <remove name="left"/>

        <reference name="root">
            <action method="setTemplate"><template>page/1column.phtml</template></action>
        </reference>
        <reference name="content">
            <block type="customer/form_register" name="customer_form_register" template="customer/form/register.phtml">
                <block type="page/html_wrapper" name="customer.form.register.fields.before" as="form_fields_before" translate="label">
                    <label>Form Fields Before</label>
                </block>
            </block>
        </reference>
    </customer_account_create>
登录后复制
句柄<!--
New customer registration
-->
<customer_account_create translate="label">
<label>Customer Account Registration Form</label>
<!-- Mage_Customer -->
<remove name="right"/>
<remove name="left"/>
<reference name="root">
<action method="setTemplate"><template>page/1column.phtml</template></action>
</reference>
<reference name="content">
<block type="customer/form_register" name="customer_form_register" template="customer/form/register.phtml">
<block type="page/html_wrapper" name="customer.form.register.fields.before" as="form_fields_before" translate="label">
<label>Form Fields Before</label>
</block>
</block>
</reference>
</customer_account_create>
句柄是 Magento 在调用特定模块时识别要加载的块的主要实体。
- 是模块特定的句柄。当有人打开客户注册页面时会触发此句柄。
- 每个处理特定于页面的内容嵌套块。某些布局文件包含
句柄。在此阶段,您可能会询问模块特定句柄和默认句柄之间的区别。简而言之,特定于模块的句柄仅在浏览器中呈现该模块时呈现其内部的块,而默认句柄会在大部分页面中加载。 句柄内部有不同的块,它们指定调用该块时要渲染的模板文件。块有两种类型:
构建块
- 内容块 在布局文件中,我们仅定义
- 内容块 ,然后将它们包装在结构器块
- 中。 例如,如果有人正在调用客户注册页面,并且我们希望将其加载到左侧、右侧、内容或页脚,我们会将该块包装在其各自的结构块中。在这里,我们在“内容”块内包装了两个块,这是一个结构块。 块包含如下属性:
-
phtmltype 定义了我们可以在其中定义不同功能的块类 - 名称 定义
- 特定块的唯一名称,以便其他块可以按名称引用现有块并扩展它
是我们可以设置的属性,允许我们定义块在结构块内的位置 <参考> 模板
定义实际的 文件名以及 HTML 和 PHP 代码所在的路径<reference>
action
<删除>as是一个属性,主要用于结构块
<remove> 标签用于删除特定块。例如,假设您不想在帐户注册页面上显示右栏和左栏。在这种情况下,您可以使用以下语法简单地删除该块:<remove name="your block name">.
<块>
标签用于扩展已经存在的块。在本例中,我们扩展了内容块并将我们自己的块插入其中。您必须使用要扩展的正确块名称。
echo $this->getChildHtml('child');
<block type='core/template' name='parent' template='parent.phtml'>
<block type='core/template' name='child' template='child.phtml'/>
</block>
根<块>
打开page.xml 布局文件,你会发现<root> 块看起来像下面这样
<block type="page/html" name="root" output="toHtml" template="page/3columns.phtml">
Magento 从根块开始渲染。所有其他块都是根块的子块。根块定义页面的结构。在这里,您可以看到当前它设置为 3columns.phtml,您可以将其更改为 1column.phtml、2columns-right.phtml 或2columns-left.phtml.
将 CSS 和 JavaScript 添加到布局 XML
对于任何特定页面,您可以将 CSS 和 JavaScript 文件添加到布局标记中,如下所示:
<customer_account_create>
 <reference name='head'>
  <action method="addCss"><stylesheet>css/styles.css</stylesheet></action>
  <action method="addJs"><script>varien/js.js</script></action>
 </reference>
</customer_account_create>
在这里您可以看到我们在客户帐户页面的 head 中添加了一个 CSS 文件和一个 JavaScript 文件。
什么是块类?
块类用于定义特定于特定块的功能。块类文件位于应用程序>代码>本地/社区/核心>您的模块命名空间>您的模块名称>块目录中。这些文件包含我们可以直接与 $this 块特定模板文件中的关键字。让我们通过一个例子来了解块类。
转到位于 app > design > frontend > base > default > layout 目录中的 review.xml 文件,并找到以下代码行:
<!--
Customer account home dashboard layout
-->

    <customer_account_index>

        <!-- Mage_Review -->
        <reference name="customer_account_dashboard">
            <block type="review/customer_recent" name="customer_account_dashboard_info1" as="info1" template="review/customer/recent.phtml"/>
        </reference>

</customer_account_index>
在这里您可以看到引用模板 review/customer_recent 的块 review/customer_recent ">最近.phtml。 转到应用 > 设计 > 前端 > 基础 > 默认 > 模板 > 审核 > 客户 并打开 最近的.phtml。
在此文件中,您可以看到使用 $this 关键字调用两个函数。它们是 $this->getCollection() 和 $this->count()。 这些函数在其块类文件 recent.php 中定义,该文件位于 应用 > 代码 > 核心 > Mage > 审查 > 阻止 > 客户 目录。
这里,块 type = "review/customer_recent" 指的是在 recent. 文件中定义的 Mage_Review_Block_Customer_Recent 块类。无论您在此类中定义什么函数,都可以直接在相应的模板文件中使用 $this 来使用它。
创建自定义模块布局和块文件
最后,我们留下了带有控制器的自定义“Hello World”模块。在这里,我们创建了自定义模块的布局文件。所以让我们创建它。
要创建布局文件,我们需要首先创建块类文件。在添加类文件之前,我们需要告诉模块我们正在包含块文件。因此,转到 app > code > local > Chiragdodia > Mymodule > etc > config.xml 并添加以下内容代码行:
<frontend>
<layout>
        <updates>
            <mymodule>
                <file>mymodule.xml</file> <!-- Our layout file name-->
            </mymodule>
        </updates>
</layout>
</frontend>
<global>
        <blocks>
            <mymodule>
                <class>Chiragdodia_Mymodule_Block</class>
            </mymodule>
        </blocks>
</global>
最终的 XML 文件包含以下代码行:
<?xml version="1.0"?>
<config>
    <modules>
        <Chiragdodia_Mymodule>
            <version>0.1.0</version>    <!-- Version of module -->
        </Chiragdodia_Mymodule>
    </modules>
    <frontend>
        <routers>
            <mymodule>
                <use>standard</use>
                <args>
                    <module>Chiragdodia_Mymodule</module>
                    <frontName>mymodule</frontName>
                </args>
            </mymodule>
        </routers>
         <layout>
            <updates>
                <mymodule>
                    <file>mymodule.xml</file> <!-- Our layout file name-->
                </mymodule>
            </updates>
         </layout>
    </frontend>
    <global>
        <blocks>
            <mymodule>
                <class>Chiragdodia_Mymodule_Block</class>
            </mymodule>
        </blocks>
    </global>
</config>
创建块类文件
接下来,转到 app > code > local > Chiragdodia > Mymodule > Block 并创建文件 Mymodule.php < /b>包含以下代码行
<?php
class Chiragdodia_Mymodule_Block_Mymodule extends Mage_Core_Block_Template
{
    public function myfunction()
    {
        return "Hello tuts+ world";
    }
}
这里我们声明了类 Chiragdodia_Mymodule_Block_Mymodule ,其中包含函数 myfunction ,我们可以直接从布局模板文件中调用它。
创建布局 XML 文件
转到app > design > frontend > default > default > layout 并创建 mymodule.xml 文件,其中包含以下代码行
<?xml version="1.0"?>
<layout version="0.1.0">
    <mymodule_index_index>
        <reference name="content">
            <block type="mymodule/mymodule" name="mymodule" template="mymodule/mymodule.phtml" />
        </reference>
    </mymodule_index_index>
</layout>
创建模板文件
转到应用 > 设计 > 前端 > 默认 > 默认 > 模板 并创建 mymodule.phtml 文件。在此文件中,我们将调用我们在块类中声明的函数 myfunction 。
<?php
    echo $this->myfunction();
?>
如果到目前为止一切都正确,您将通过访问 URL yoursite.com/index.php/mymodule/index 看到具有三列布局的输出。
在某些 Magento 版本中,默认主题不包含布局和模板目录。在这种情况下,您可以在app > design > frontend > base 目录中创建布局和模板文件。
这就是 Magento 中布局的工作原理。在上一篇文章中,我们创建了简单的“Hello World”模块,在本文中我们使用布局文件创建它。 Magento 的布局结构一开始有点难以理解,但是一旦你开始修改它,你就会很容易地理解它背后的想法。
在这篇文章中,我附上了我们迄今为止创建的模块演示文件。如果您对此特定问题有任何疑问,请随时发表评论并提出任何问题。
以上是使用Magento进行自定义布局和模板设计的详细内容。更多信息请关注PHP中文网其他相关文章!

热AI工具

Undresser.AI Undress
人工智能驱动的应用程序,用于创建逼真的裸体照片

AI Clothes Remover
用于从照片中去除衣服的在线人工智能工具。

Undress AI Tool
免费脱衣服图片

Clothoff.io
AI脱衣机

AI Hentai Generator
免费生成ai无尽的。

热门文章

热工具

记事本++7.3.1
好用且免费的代码编辑器

SublimeText3汉化版
中文版,非常好用

禅工作室 13.0.1
功能强大的PHP集成开发环境

Dreamweaver CS6
视觉化网页开发工具

SublimeText3 Mac版
神级代码编辑软件(SublimeText3)

热门话题
 php中的卷曲:如何在REST API中使用PHP卷曲扩展
Mar 14, 2025 am 11:42 AM
PHP客户端URL(curl)扩展是开发人员的强大工具,可以与远程服务器和REST API无缝交互。通过利用Libcurl(备受尊敬的多协议文件传输库),PHP curl促进了有效的执行
 解释PHP中晚期静态结合的概念。
Mar 21, 2025 pm 01:33 PM
文章讨论了PHP 5.3中引入的PHP中的晚期静态结合(LSB),从而允许静态方法的运行时分辨率调用以获得更灵活的继承。 LSB的实用应用和潜在的触摸
 在PHP API中说明JSON Web令牌(JWT)及其用例。
Apr 05, 2025 am 12:04 AM
JWT是一种基于JSON的开放标准,用于在各方之间安全地传输信息,主要用于身份验证和信息交换。1.JWT由Header、Payload和Signature三部分组成。2.JWT的工作原理包括生成JWT、验证JWT和解析Payload三个步骤。3.在PHP中使用JWT进行身份验证时,可以生成和验证JWT,并在高级用法中包含用户角色和权限信息。4.常见错误包括签名验证失败、令牌过期和Payload过大,调试技巧包括使用调试工具和日志记录。5.性能优化和最佳实践包括使用合适的签名算法、合理设置有效期、
 如何用PHP的cURL库发送包含JSON数据的POST请求?
Apr 01, 2025 pm 03:12 PM
使用PHP的cURL库发送JSON数据在PHP开发中,经常需要与外部API进行交互,其中一种常见的方式是使用cURL库发送POST�...
 ReactPHP的非阻塞特性究竟是什么?如何处理其阻塞I/O操作?
Apr 01, 2025 pm 03:09 PM
深入解读ReactPHP的非阻塞特性ReactPHP的一段官方介绍引起了不少开发者的疑问:“ReactPHPisnon-blockingbydefault....


