
在本系列的最后一篇文章中,我们了解了可用于发出远程请求的 PHP 函数。
具体来说,我们审查了:
file_get_contentscURL我们还讨论了 WordPress 函数 wp_remote_get。
在本文中,我们将让 wp_remote_get 发挥作用。此函数是 HTTP API 的一部分 - 通过使用它来检索以下两件事来实际使用:
好处是我们不需要使用任何 OAuth 或身份验证机制,而只需要利用 Twitter 响应和 PHP 的 JSON 功能。
因此,在本文中,我们将实际了解如何做到这一点,然后我们将在本系列结束时回顾 wp_remote_get 返回的所有信息,以便我们知道如何正确执行此操作在以后的工作中处理好。
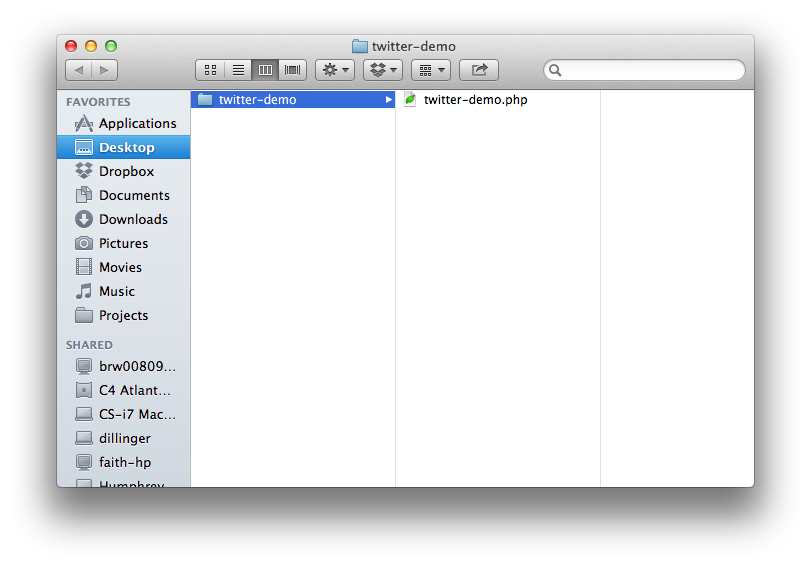
与所有插件一样,我们需要做的第一件事是在 wp-content/plugins 目录中创建一个目录。出于本演示的目的,我们将我们的插件称为 Twitter 演示。
因此,我们将插件目录命名为 twitter-demo 以及关联的插件文件 twitter-demo.php。
接下来,我们需要继续删除插件的标头,以便 WordPress 能够检测到插件文件,所以我们现在就这样做。
首先,将以下代码放入 twitter-demo.php 文件的标头中:
<?php
/* Plugin Name: Twitter Demo
 * Plugin URI:  http://example.com/twitter-demo/
 * Description: Retrieves the number of followers and latest Tweet from your Twitter account.
 * Version:     1.0.0
 * Author:      Tom McFarlin
 * Author URI:  http://tommcfarlin.com/
 * License:     GPL-2.0+
 * License URI: http://www.gnu.org/licenses/gpl-2.0.txt
 */
请注意,我们不会将该插件国际化。我们在另一篇文章中讨论了这个主题,这超出了我们在本文中尝试做的范围。
此时,您应该能够在 WordPress 安装的插件仪表板中看到该插件。您可以激活它;然而,它实际上不会做任何事情。
至少现在还没有。
与我在这里发布的其他演示插件一样,我认为在开始编码之前首先概述插件要做什么非常重要。
因此,我们可以期待以下结果:
当然,在帖子底部显示此内容有点令人讨厌,但请记住,此插件的目的是演示如何使用 wp_remote_get,如何解析来自 Twitter 的响应,以及如何显示它。
我们不太关心内容显示在哪里。
那么,让我们继续删除将提供此功能的类。
在进行任何操作之前,我们先删除将用于向 Twitter 发出请求的类。我已包含以下所有代码以及每个属性和方法的文档。
<?php
/**
 * Plugin Name: Twitter Demo
 * Plugin URI:  http://tommcfarlin.com/twitter-demo/
 * Description: Retrieves the number of followers and latest Tweet from your Twitter account.
 * Version:     1.0.0
 * Author:      Tom McFarlin
 * Author URI:  http://tommcfarlin.com/
 * License:     GPL-2.0+
 * License URI: http://www.gnu.org/licenses/gpl-2.0.txt
 */

class Twitter_Demo {

	/**
	 * Instance of this class.
	 *
	 * @var      Twitter_Demo
	 */
	private static $instance;

	/**
	 * Initializes the plugin so that the Twitter information is appended to the end of a single post.
	 * Note that this constructor relies on the Singleton Pattern
	 *
	 * @access private
	 */
	private function __construct() {

	} // end constructor

	/**
	 * Creates an instance of this class
	 *
	 * @access public
	 * @return Twitter_Demo    An instance of this class
	 */
	public function get_instance() {

	} // end get_instance

	/**
	 * Appends a message to the bottom of a single post including the number of followers and the last Tweet.
	 *
	 * @access public
	 * @param  $content    The post content
	 * @return $content    The post content with the Twitter information appended to it.
	 */
	public function display_twitter_information( $content ) {

	} // end display_twitter_information

	/**
	 * Attempts to request the specified user's JSON feed from Twitter
	 *
	 * @access public
	 * @param  $username   The username for the JSON feed we're attempting to retrieve
	 * @return $json       The user's JSON feed or null of the request failed
	 */
	private function make_twitter_request( $username ) {

	} // end make_twitter_request

	/**
	 * Retrieves the number of followers from the JSON feed
	 *
	 * @access private
	 * @param  $json     The user's JSON feed
	 * @return           The number of followers for the user. -1 if the JSON data isn't properly set.
	 */
	private function get_follower_count( $json ) {

	} // end get_follower_count

	/**
	 * Retrieves the last tweet from the user's JSON feed
	 *
	 * @access private
	 * @param  $json     The user's JSON feed
	 * @return           The last tweet from the user's feed. '[ No tweet found. ]' if the data isn't properly set.
	 */
	private function get_last_tweet( $json ) {

	} // end get_last_tweet

} // end class

// Trigger the plugin
Twitter_Demo::get_instance();
请注意,我们将随时填充这些方法的其余部分,并且我还将在文章末尾提供该插件的完整源代码。
在我们进一步讨论之前,我想指出我们将为此插件使用单例模式。我们在上一篇文章中介绍了这种设计模式,尽管它的优点超出了本文的范围,但我建议您阅读相关文章,以确保您完全理解我们为什么要以这种方式设置插件。
接下来,让我们看一下我们已经列出的功能,以便我们准确地知道我们的前进方向:
display_twitter_information 将用于在帖子底部呈现消息make_twitter_request 会实际从 Twitter 请求并返回数据(如果请求失败则返回 null)get_follower_count 将返回指定用户的关注者数量(如果有问题则返回 -1)get_last_tweet 将返回用户的最后一条推文,或者如果插件失败则返回一条消息够清楚了吗?现在,让我们从 Twitter 请求信息,以便我们可以处理它。
首先,让我们使用以下代码填充 make_twitter_request 函数。请注意,我将在代码后面对其进行解释:
private function make_twitter_request( $username ) {

	$response = wp_remote_get( 'https://twitter.com/users/' . $username . '.json' );
	try {

		// Note that we decode the body's response since it's the actual JSON feed
		$json = json_decode( $response['body'] );

	} catch ( Exception $ex ) {
		$json = null;
	} // end try/catch

	return $json;

}
在代码的第一行中,我们利用 wp_remote_get 来发出我们的请求。请注意,我们使用 $username 参数来检索用户的 JSON feed。请注意,使用 wp_remote_get 来发出我们的请求。请注意,我们使用 $username 参数来检索用户的 JSON feed。请注意,使用
此用户名是从我们稍后会查看的另一个函数传入的。🎜
接下来,请注意我们将代码包装在 try/catch 中。这是因为向 Twitter 发出的请求可能会失败。如果没有失败,那么我们将使用 PHP 的 json_decode 函数来解码响应的正文;否则,我们会将响应设置为 null。
这将使调用函数中的条件变得简单。
在我们进一步讨论之前,重要的是要注意这里有一个微妙的要点:请注意,我们正在解码返回的 $response 数组的 'body' 键。对于对此更好奇的人,我们将在下一篇文章中详细查看使用 wp_remote_get 时出现的响应。
现在,只需注意 $response 数组的 body 索引只是我们可用的一条信息。
现在我们已经定义了负责向 Twitter 发出请求的函数,接下来让我们定义一个函数,该函数将从 Twitter 请求数据,然后将其显示在帖子内容下方。
同样,这是代码,之后我将准确解释它的作用:
public function display_twitter_information( $content ) {

	// If we're on a single post or page...
	if ( is_single() ) {

		// ...attempt to make a response to twitter. Note that you should replace your username here!
		if ( null == ( $json_response = $this->make_twitter_request( 'wptuts' ) ) ) {

			// ...display a message that the request failed
			$html = '
<div id="twitter-demo-content">';
 $html .= 'There was a problem communicating with the Twitter API..';
 $html .= '</div>
<!-- /#twitter-demo-content -->';

		// ...otherwise, read the information provided by Twitter
		} else {

			$html = '
<div id="twitter-demo-content">';
 $html .= 'I have ' . $this->get_follower_count( $json_response ) . ' followers and my last tweet was "' . $this->get_last_tweet( $json_response ) . '".';
 $html .= '</div>
<!-- /#twitter-demo-content -->';

		} // end if/else

		$content .= $html;

	} // end if/else

	return $content;

}
首先,要知道这是整个插件中最长的函数。如果您能对此进行筛选,那么您就可以开始了。
记住:这个函数将在插件完全完成后在我们的构造函数中定义的 the_content 操作期间被调用。
因此,该函数首先检查我们是否在单个帖子上。如果没有,那么它只会返回内容;否则,它将执行以下操作:
重要说明:在此函数中,您可以指定要检索其信息的用户名。例如,请注意,我正在尝试通过调用 $this->make_twitter_request('wptuts') 来检索 @WPTuts 的信息。
此时,我们已准备好读取信息并将字符串连接到消息中以显示给用户。我们将使用 get_follower_count 方法和 get_last_tweet 来完成此操作。
因为这些方法非常相似,所以我们将看一下它们,然后我将在代码后面解释它们:
private function get_follower_count( $json ) {
	return ( -1 < $json->followers_count ) ? $json->followers_count : -1;
} // end get_follower_count

private function get_last_tweet( $json ) {
	return ( 0 < strlen( $json->status->text ) ) ? $json->status->text : '[ No tweet found. ]';
} // end get_last_tweet
请注意,这两个函数的相似之处在于它们都接受插件早期的 $json 数据。接下来,它们都使用三元运算符来确定是否应该返回请求的文本或默认消息。
换句话说,如果我们要显示 followers_count 并且该值大于 -1,那么我们知道我们有一个要显示的值,因此我们将返回它;否则,我们将返回 -1 作为该值未正确设置的指示符。
这使我们能够针对处理数据时可能出错的问题进行防御性编码。
正如所承诺的,这里是完整的源代码以及匹配的文档:
<?php
/**
 * Plugin Name: Twitter Demo
 * Plugin URI:  http://example.com/twitter-demo/
 * Description: Retrieves the number of followers and latest Tweet from your Twitter account.
 * Version:     1.0.0
 * Author:      Tom McFarlin
 * Author URI:  http://tommcfarlin.com/
 * License:     GPL-2.0+
 * License URI: http://www.gnu.org/licenses/gpl-2.0.txt
 */
class Twitter_Demo {
	/**
	 * Instance of this class.
	 *
	 * @var      Twitter_Demo
	 */
	private static $instance;

	/**
	 * Initializes the plugin so that the Twitter information is appended to the end of a single post.
	 * Note that this constructor relies on the Singleton Pattern
	 *
	 * @access private
	 */
	private function __construct() {
		add_action( 'the_content', array( $this, 'display_twitter_information' ) );
	} // end constructor

	/**
	 * Creates an instance of this class
	 *
	 * @access public
	 * @return Twitter_Demo    An instance of this class
	 */
	public function get_instance() {
		if ( null == self::$instance ) {
			self::$instance = new self;
		}
		return self::$instance;
	} // end get_instance

	/**
	 * Appends a message to the bottom of a single post including the number of followers and the last Tweet.
	 *
	 * @access public
	 * @param  $content    The post content
	 * @return $content    The post content with the Twitter information appended to it.
	 */
	public function display_twitter_information( $content ) {
		// If we're on a single post or page...
		if ( is_single() ) {
			// ...attempt to make a response to twitter. Note that you should replace your username here!
			if ( null == ( $json_response = $this--->make_twitter_request('wptuts') ) ) {

				// ...display a message that the request failed
				$html = '
<div id="twitter-demo-content">';
 $html .= 'There was a problem communicating with the Twitter API..';
 $html .= '</div>
<!-- /#twitter-demo-content -->';

				// ...otherwise, read the information provided by Twitter
			} else {

				$html = '
<div id="twitter-demo-content">';
 $html .= 'I have ' . $this->get_follower_count( $json_response ) . ' followers and my last tweet was "' . $this->get_last_tweet( $json_response ) . '".';
 $html .= '</div>
<!-- /#twitter-demo-content -->';

			} // end if/else

			$content .= $html;

		} // end if/else

		return $content;

	} // end display_twitter_information

	/**
	 * Attempts to request the specified user's JSON feed from Twitter
	 *
	 * @access public
	 * @param  $username   The username for the JSON feed we're attempting to retrieve
	 * @return $json       The user's JSON feed or null of the request failed
	 */
	private function make_twitter_request( $username ) {

		$response = wp_remote_get( 'https://twitter.com/users/' . $username . '.json' );
		try {

			// Note that we decode the body's response since it's the actual JSON feed
			$json = json_decode( $response['body'] );

		} catch ( Exception $ex ) {
			$json = null;
		} // end try/catch

		return $json;

	} // end make_twitter_request

	/**
	 * Retrieves the number of followers from the JSON feed
	 *
	 * @access private
	 * @param  $json     The user's JSON feed
	 * @return           The number of followers for the user. -1 if the JSON data isn't properly set.
	 */
	private function get_follower_count( $json ) {
		return ( -1 < $json->followers_count ) ? $json->followers_count : -1;
	} // end get_follower_count

	/**
	 * Retrieves the last tweet from the user's JSON feed
	 *
	 * @access private
	 * @param  $json     The user's JSON feed
	 * @return           The last tweet from the user's feed. '[ No tweet found. ]' if the data isn't properly set.
	 */
	private function get_last_tweet( $json ) {
		return ( 0 < strlen( $json->status->text ) ) ? $json->status->text : '[ No tweet found. ]';
	} // end get_last_tweet

} // end class

// Trigger the plugin
Twitter_Demo::get_instance();
其实很简单,对吧?事实上,代码注释的数量与实际代码行的数量一样多,因此插件本身非常小。
这个演示展示了使用 wp_remote_get 与第三方服务交互、解析它们的响应并将其集成到插件中是多么容易。诚然,这非常很简单,但它仍然证明了这个概念。
在本系列的下一篇文章中,我们将查看可以传递给 wp_remote_get 的所有信息,以了解该方法的灵活性。之后,我们将详细查看响应数据,以便我们能够编写更复杂的请求并编写更多的防御性代码,更具防御性。
以上是探索 WordPress HTTP API:wp_remote_get 的真实插图的详细内容。更多信息请关注PHP中文网其他相关文章!


