

Linux必备!使用SHC加密工具保护Shell脚本代码安全

在 Linux 系统上使用脚本是很常见的,然而,由于脚本代码的开放性,有时会出现脚本被恶意修改、复制、传播等情况。为此,我们需要一种能够保护脚本代码安全性的方法。SHC 是一款非常实用的加密工具,可以帮助我们将 Shell 脚本加密,保护代码的安全。
如何在Linux环境中加密shell脚本?shell脚本包含密码,不希望其他具有执行权限的人查看shell脚本并获取密码。可以安装使用shc工具,普通用户无法读取shc创建的加密Shell脚本。SHC是指:Shell脚本编译器(Shell Script Compiler)。
环境
Centos8
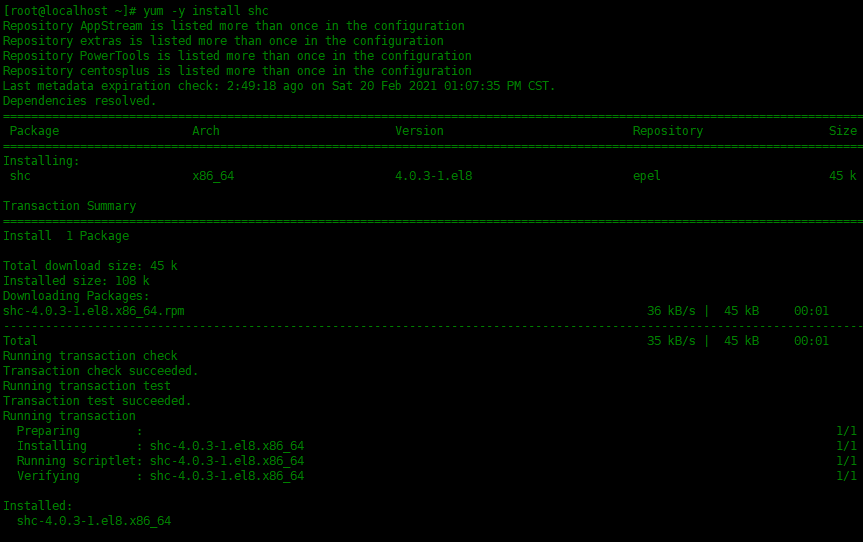
安装shc
[root@localhost ~]# yum -y install shc
创建一个shell脚本
下面创建一个脚本文件:
[root@localhost ~]# vim welcome.sh

#!/bin/sh
echo "Welcome to linux world"
使用shc加密该脚本文件
如下所示,使用shc加密welcome.sh脚本。
[root@localhost scripts]# shc -v -f welcome.sh
shc shll=sh
shc [-i]=-c
shc [-x]=exec '%s' "$@"
shc [-l]=
shc opts=
shc: cc   welcome.sh.x.c -o welcome.sh.x
shc: strip welcome.sh.x
shc: chmod ug=rwx,o=rx welcome.sh.x
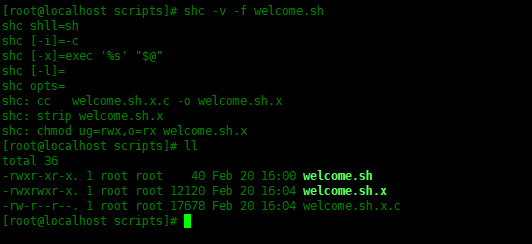
- welcome.sh 是原始的未加密shell脚本
- welcome.sh.x 是二进制格式的加密shell脚本
- welcome.sh.x.c 是welcome.sh文件的C源代码。编译该C源代码以创建上面的加密的welcome.sh.x文件。
可以使用file命令查看文件的类型:
[root@localhost scripts]# file welcome.sh
welcome.sh: POSIX shell script, ASCII text executable
[root@localhost scripts]# file welcome.sh.x
welcome.sh.x: ELF 64-bit LSB executable, x86-64, version 1 (SYSV), dynamically linked, interpreter /lib64/ld-linux-x86-

64.so.2, for GNU/Linux 3.2.0, BuildID[sha1]=35e0e2569eca90774e379d6fef51ad6fedf346f5, s

tripped
[root@localhost scripts]# file welcome.sh.x.c
welcome.sh.x.c: C source, ASCII text
[root@localhost scripts]#

执行加密后的shell脚本
现在,让我们执行加密的Shell脚本,确保能够运行:
[root@localhost scripts]# ./welcome.sh.x
Welcome to linux world

指定Shell脚本的过期时间
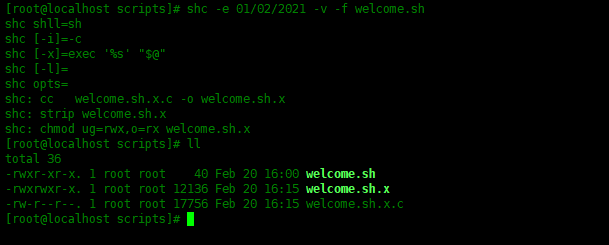
使用shc,您还可以指定到期日期。即在这个到期日期之后,当有人尝试执行Shell脚本时,将收到错误消息。使用shc -e选项创建一个新的加密Shell脚本,指定到期日期。到期日期以dd/mm/yyyy 格式指定。
# 删除之前创建的.x , .x.c文件
[root@localhost scripts]# rm -rf welcome.sh.x*
# 创建带有过期时间的加密脚本
[root@localhost scripts]# shc -e 01/02/2021 -v -f welcome.sh
shc shll=sh
shc [-i]=-c
shc [-x]=exec '%s' "$@"
shc [-l]=
shc opts=
shc: cc   welcome.sh.x.c -o welcome.sh.x
shc: strip welcome.sh.x
shc: chmod ug=rwx,o=rx welcome.sh.x
在此示例中,如果有人尝试执行welcome.sh.x脚本文件,会提示已过期。
[root@localhost scripts]# ./welcome.sh.x
./welcome.sh.x: has expired!
Please contact your provider jahidulhamid@yahoo.com

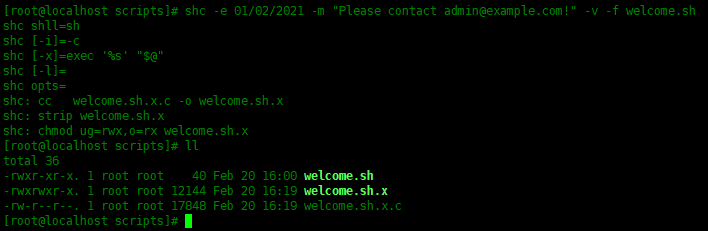
如果要指定自定义到期消息,需要加入-m选项。
[root@localhost scripts]# shc -e 01/02/2021 -m "Please contact admin@example.com!" -v -f welcome.sh
shc shll=sh
shc [-i]=-c
shc [-x]=exec '%s' "$@"
shc [-l]=
shc opts=
shc: cc   welcome.sh.x.c -o welcome.sh.x
shc: strip welcome.sh.x
shc: chmod ug=rwx,o=rx welcome.sh.x
使用 SHC 工具可以轻松地将 Shell 脚本加密,有效地保护了脚本的安全性。本文通过实例讲解了如何使用 SHC 工具对 Shell 脚本进行加密操作,同时也提供了解决一些常见问题的方法。希望本文能给 Shell 脚本编写者提供一个有效的保护方式,让脚本代码更加安全可靠。
以上是Linux必备!使用SHC加密工具保护Shell脚本代码安全的详细内容。更多信息请关注PHP中文网其他相关文章!

热AI工具

Undresser.AI Undress
人工智能驱动的应用程序,用于创建逼真的裸体照片

AI Clothes Remover
用于从照片中去除衣服的在线人工智能工具。

Undress AI Tool
免费脱衣服图片

Clothoff.io
AI脱衣机

AI Hentai Generator
免费生成ai无尽的。

热门文章
热工具

记事本++7.3.1
好用且免费的代码编辑器

SublimeText3汉化版
中文版,非常好用

禅工作室 13.0.1
功能强大的PHP集成开发环境

Dreamweaver CS6
视觉化网页开发工具

SublimeText3 Mac版
神级代码编辑软件(SublimeText3)
热门话题


 linux怎么启动nginx
Apr 14, 2025 pm 12:51 PM
linux怎么启动nginx
Apr 14, 2025 pm 12:51 PM
在 Linux 中启动 Nginx 的步骤:检查 Nginx 是否已安装。使用 systemctl start nginx 启动 Nginx 服务。使用 systemctl enable nginx 启用在系统启动时自动启动 Nginx。使用 systemctl status nginx 验证启动是否成功。在 Web 浏览器中访问 http://localhost 查看默认欢迎页面。
 怎么查看nginx是否启动
Apr 14, 2025 pm 01:03 PM
怎么查看nginx是否启动
Apr 14, 2025 pm 01:03 PM
确认 Nginx 是否启动的方法:1. 使用命令行:systemctl status nginx(Linux/Unix)、netstat -ano | findstr 80(Windows);2. 检查端口 80 是否开放;3. 查看系统日志中 Nginx 启动消息;4. 使用第三方工具,如 Nagios、Zabbix、Icinga。
 怎么启动nginx服务器
Apr 14, 2025 pm 12:27 PM
怎么启动nginx服务器
Apr 14, 2025 pm 12:27 PM
启动 Nginx 服务器需要按照不同操作系统采取不同的步骤:Linux/Unix 系统:安装 Nginx 软件包(例如使用 apt-get 或 yum)。使用 systemctl 启动 Nginx 服务(例如 sudo systemctl start nginx)。Windows 系统:下载并安装 Windows 二进制文件。使用 nginx.exe 可执行文件启动 Nginx(例如 nginx.exe -c conf\nginx.conf)。无论使用哪种操作系统,您都可以通过访问服务器 IP
 nginx403错误怎么解决
Apr 14, 2025 pm 12:54 PM
nginx403错误怎么解决
Apr 14, 2025 pm 12:54 PM
服务器无权访问所请求的资源,导致 nginx 403 错误。解决方法包括:检查文件权限。检查 .htaccess 配置。检查 nginx 配置。配置 SELinux 权限。检查防火墙规则。排除其他原因,如浏览器问题、服务器故障或其他可能的错误。
 nginx403怎么解决
Apr 14, 2025 am 10:33 AM
nginx403怎么解决
Apr 14, 2025 am 10:33 AM
如何解决 Nginx 403 Forbidden 错误?检查文件或目录权限;2. 检查 .htaccess 文件;3. 检查 Nginx 配置文件;4. 重启 Nginx。其他可能原因还包括防火墙规则、SELinux 设置或应用程序问题。
 nginx304错误怎么解决
Apr 14, 2025 pm 12:45 PM
nginx304错误怎么解决
Apr 14, 2025 pm 12:45 PM
问题的答案:304 Not Modified 错误表示浏览器已缓存客户端请求的最新资源版本。解决方案:1. 清除浏览器缓存;2. 禁用浏览器缓存;3. 配置 Nginx 允许客户端缓存;4. 检查文件权限;5. 检查文件哈希;6. 禁用 CDN 或反向代理缓存;7. 重启 Nginx。
 linux怎么查看nginx是否启动
Apr 14, 2025 pm 12:48 PM
linux怎么查看nginx是否启动
Apr 14, 2025 pm 12:48 PM
在 Linux 中,使用以下命令检查 Nginx 是否已启动:systemctl status nginx根据命令输出进行判断:如果显示 "Active: active (running)",则 Nginx 已启动。如果显示 "Active: inactive (dead)",则 Nginx 已停止。
 nginx error日志怎么清理
Apr 14, 2025 pm 12:21 PM
nginx error日志怎么清理
Apr 14, 2025 pm 12:21 PM
错误日志位于 /var/log/nginx(Linux)或 /usr/local/var/log/nginx(macOS),使用命令行清理步骤:1. 备份原日志;2. 创建空文件作为新日志;3. 重启 Nginx 服务。也可使用第三方工具(如 logrotate)或配置自动清理。
