

在服务器搭建Tengine+HHVM环境运行WordPress

系统环境 阿里云1核+512M内存 Ubuntu 12.04 64位 Wordpress 3.9 修改系统软件源 参考http://mirrors.aliyun.com/help/ubuntu deb http://mirrors.aliyun.com/ubuntu/ precise main restricted universe multiverse deb http://mirrors.aliyun.com/ubuntu/ pr
系统环境
阿里云1核+512M内存 Ubuntu 12.04 64位
Wordpress 3.9
修改系统软件源
参考http://mirrors.aliyun.com/help/ubuntu
  deb http://mirrors.aliyun.com/ubuntu/ precise main restricted universe multiverse
  deb http://mirrors.aliyun.com/ubuntu/ precise-security main restricted universe multiverse
  deb http://mirrors.aliyun.com/ubuntu/ precise-updates main restricted universe multiverse
  deb http://mirrors.aliyun.com/ubuntu/ precise-proposed main restricted universe multiverse
  deb http://mirrors.aliyun.com/ubuntu/ precise-backports main restricted universe multiverse
  deb-src http://mirrors.aliyun.com/ubuntu/ precise main restricted universe multiverse
  deb-src http://mirrors.aliyun.com/ubuntu/ precise-security main restricted universe multiverse
  deb-src http://mirrors.aliyun.com/ubuntu/ precise-updates main restricted universe multiverse
  deb-src http://mirrors.aliyun.com/ubuntu/ precise-proposed main restricted universe multiverse
  deb-src http://mirrors.aliyun.com/ubuntu/ precise-backports main restricted universe multiverse
若使用阿里云服务器,将源的域名从mirrors.aliyun.com改为mirrors.aliyuncs.com,不占用公网流量,而且下载速度更快。
更新系统软件
sudo apt-get update && sudo apt-get upgrade
安装Tengine
1、安装依赖软件
apt-get --install-suggests install gcc g++ make
2、下载相关软件
wget http://jaist.dl.sourceforge.net/project/pcre/pcre/8.35/pcre-8.35.tar.gz
wget http://zlib.net/zlib-1.2.8.tar.gz
wget http://www.openssl.org/source/openssl-1.0.1g.tar.gz
wget http://www.canonware.com/download/jemalloc/jemalloc-3.6.0.tar.bz2
wget http://tengine.taobao.org/download/tengine-2.0.2.tar.gz
3、安装Pcre
  tar zxvf pcre-8.35.tar.gz
  cd pcre-8.35
 ./configure --prefix=/usr/local/pcre-8.35
  make && make install
4、安装Zlib
  cd ..
  tar zxvf zlib-1.2.8.tar.gz
  cd zlib-1.2.8
  ./configure --prefix=/usr/local/zlib-1.2.8
  make && make install
5、安装OpenSSl
  cd ..
  tar zxvf openssl-1.0.1g.tar.gz
  cd openssl-1.0.1g
  ./config --prefix=/usr/local/openssl-1.0.1g
  make && make install
6、解压jemalloc不需要安装
cd .. && tar jxvf jemalloc-3.6.0.tar.bz2
7、安装Tengine
  ./configure --prefix=/usr/local/nginx \
--user=www-data \
--group=www-data \
--with-pcre=/usr/local/src/pcre-8.35 \
--with-zlib=/usr/local/src/zlib-1.2.8 \
--with-openssl=/usr/local/src/openssl-1.0.1g \
--with-jemalloc=/usr/local/src/jemalloc-3.6.0 \
--with-http_gzip_static_module \
--with-http_realip_module \
--with-http_stub_status_module \
--with-http_concat_module
make && make install
安装HHVM
其他系统参考https://github.com/facebook/hhvm/wiki
echo '140.211.166.134  dl.hhvm.com' >> /etc/hosts
sudo apt-get install software-properties-common python-software-properties
sudo add-apt-repository ppa:mapnik/boost
wget -O - http://dl.hhvm.com/conf/hhvm.gpg.key | sudo apt-key add -
echo deb http://dl.hhvm.com/ubuntu precise main | sudo tee /etc/apt/sources.list.d/hhvm.list
sudo apt-get update
sudo apt-get install hhvm
server hhvm start # 启动HHVM
如果想使用UNIX socket的方式启动HHVM,需要修改/etc/hhvm/server.ini
  ; php options
  pid = /var/run/hhvm/pid
  ; hhvm specific
  ;hhvm.server.port = 9000
  hhvm.server.type = fastcgi
  hhvm.server.file_socket = /var/run/hhvm/hhvm.sock
  hhvm.server.default_document = index.php
  hhvm.log.level = Error
  hhvm.log.always_log_unhandled_exceptions = true
  hhvm.log.runtime_error_reporting_level = 8191
  hhvm.log.use_log_file = true
  hhvm.log.file = /var/log/hhvm/error.log
  hhvm.repo.central.path = /var/run/hhvm/hhvm.hhbc
  hhvm.mysql.typed_results = false
配置nginx.conf,
  #user  nobody;
worker_processes  auto;
worker_rlimit_nofile 100000;
#error_log  logs/error.log;
#error_log  logs/error.log  notice;
#error_log  logs/error.log  info;
#pid        logs/nginx.pid;
events {
    worker_connections  65535;
    use epoll;
    multi_accept on;
}
# load modules compiled as Dynamic Shared Object (DSO)
#
#dso {
#    load ngx_http_fastcgi_module.so;
#    load ngx_http_rewrite_module.so;
#}
http {
    include       mime.types;
    default_type  application/octet-stream;
    log_format  main  '$remote_addr - $remote_user [$time_local] "$request" '
                      '$status $body_bytes_sent "$http_referer" '
                      '"$http_user_agent" "$http_x_forwarded_for"';
    #access_log  logs/access.log  main;
    access_log off;
    upstream hhvm {
        server unix:/var/run/hhvm/hhvm.sock;
        #server 127.0.0.1:9000;
    }
    server_tokens off;
    sendfile        on;
    tcp_nopush     on;
    keepalive_timeout  65;
    server_names_hash_bucket_size 128;
    client_header_buffer_size 32k;
    large_client_header_buffers 4 32k;
    client_max_body_size 20m;
    open_file_cache          max=10000 inactive=5m;
    open_file_cache_valid    2m;
    open_file_cache_min_uses 1;
    open_file_cache_errors   on;
    #gzip  on;
    include gzip.conf;
    #vhost
    include vhost_liuzhichao.com;
}
vim /etc/nginx/conf/gzip.conf
    gzip  on;
    gzip_proxied any;
    gzip_types text/css;
    gzip_types text/csv;
    gzip_types text/plain;
    gzip_types text/javascript;
    gzip_types application/javascript;
    gzip_types application/json;
    gzip_types application/x-javascript;
    gzip_types application/ecmascript;
    gzip_types application/xml;
    gzip_types application/xml+rss;
    gzip_types application/rss+xml;
    gzip_types application/atom_xml;
    gzip_types application/xhtml+xml;
    gzip_types application/x-font-ttf;
    gzip_types application/x-font-opentype;
    gzip_types application/vnd.ms-fontobject;
    gzip_types image/svg+xml;
    gzip_types image/x-icon;
    gzip_types text/xml;
    gzip_comp_level 3;
    gzip_http_version 1.1;
    gzip_vary on;
    gzip_disable "MSIE [1-6]\.(?!.*SV1)";
    gzip_buffers 16 8k;
    gzip_min_length 20;
vim vhost_liuzhichao.com
  server{
        listen 80;
        server_name liuzhichao.com www.liuzhichao.com;
        root /var/www/liuzhichao.com;
        index index.html index.htm index.php;
        charset utf-8;
        #access_log /var/log/nginx/liuzhichao.com-access.log main;
        access_log /dev/null;
        error_log  /var/log/nginx/liuzhichao.com/error.log error;
        location / {
           try_files $uri $uri/ /index.php$is_args$args;
        }
        location ~ /wp-content/uploads/.*\.(php|php5)?$ {
                deny all;
        }
        location = /favicon.ico {
                log_not_found off;
                access_log off;
                expires max;
        }
        location = /robots.txt {
                allow all;
                log_not_found off;
                access_log off;
        }
        #Browser Cache Control Directives
        #Prevent (deny) Access to Hidden Files with Nginx
        location ~ /\. {
                access_log off;
                log_not_found off;
        }
        # Cache static files for as long as possible
        location ~* .(ogg|ogv|svg|svgz|eot|otf|woff|mp4|ttf|css|rss|atom|js|jpg|jpeg|gif|png|ico|zip|tgz|gz|rar|bz2|doc|xls|exe|ppt|tar|mid|midi|wav|bmp|rtf)$ {
                expires max; log_not_found off; access_log off;
        }
        #The HHVM Magic Here
        location ~ \.(hh|php)$ {
                fastcgi_keep_conn on;
                try_files $uri = 404;
                fastcgi_index index.php;
                fastcgi_split_path_info ^(.+.php)(/.+)$;
                include fastcgi_params;
                fastcgi_param SCRIPT_FILENAME $document_root$fastcgi_script_name;
                fastcgi_pass hhvm;
        }
从目前的试用情况来看,查看阿里云监控,CPU占用率相对之前nginx+php-fpm架构低了不只是一点点,内存使用率也比较平稳.只是在上传文件或是更新插件时,经常会导致HHVM进程终止,然后网站出现502错误。不知道是不是因为上面的配置问题。
?
原文地址:在服务器搭建Tengine+HHVM环境运行WordPress, 感谢原作者分享。

热AI工具

Undresser.AI Undress
人工智能驱动的应用程序,用于创建逼真的裸体照片

AI Clothes Remover
用于从照片中去除衣服的在线人工智能工具。

Undress AI Tool
免费脱衣服图片

Clothoff.io
AI脱衣机

Video Face Swap
使用我们完全免费的人工智能换脸工具轻松在任何视频中换脸!

热门文章
热工具

记事本++7.3.1
好用且免费的代码编辑器

SublimeText3汉化版
中文版,非常好用

禅工作室 13.0.1
功能强大的PHP集成开发环境

Dreamweaver CS6
视觉化网页开发工具

SublimeText3 Mac版
神级代码编辑软件(SublimeText3)
热门话题


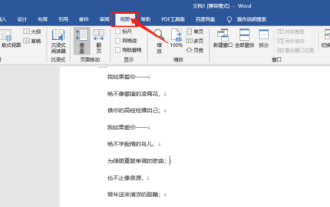 Word怎么显示标尺以及标尺的操作方法详解!
Mar 20, 2024 am 10:46 AM
Word怎么显示标尺以及标尺的操作方法详解!
Mar 20, 2024 am 10:46 AM
我们在使用Word的时候,为了编辑内容更好美观,我们经常会使用标尺。要知道,在Word中的标尺包括水平标尺和垂直标尺,用于显示和调整文档的页边距、段落缩进、制表符等。那么,Word中的标尺怎么显示出来的呢?下面,我就来教大家设置标尺的显示方法。有需要的同学赶紧收藏起来吧!步骤如下:1、首先,我们需要把word标尺调出来,默认的word文档是不显示word标尺的,我们只需要点击word中的【视图】的按钮。2、然后,我们找到【标尺】的选项,勾选就可以了。这样一来,word标尺就被我们调出来了!是不是
 word文档怎么加手写签名
Mar 20, 2024 pm 08:56 PM
word文档怎么加手写签名
Mar 20, 2024 pm 08:56 PM
Word文档由于功能的强大被大家广泛使用,word里不但可以插入各种格式,比如图片和表格等等,现在为了文件的完整性真实性,好多文件都需要在文档末尾加入手工签名,听起来这么复杂的问题怎么解决呢,今天小编就教大家word文档怎么加手写签名。使用扫描仪、相机或手机对手写签名进行扫描或拍摄,然后通过PS或其他图片编辑软件对图片进行必要的裁剪处理。2.在要插入手写签名的Word文档中选择“插入—图片—来自文件”,选择裁剪好的手写签名。3.鼠标双击手写签名图片(或右击图片选择“设置图片格式”),弹出“设置图
 如何将Dnsmasq配置为DHCP中继服务器
Mar 21, 2024 am 08:50 AM
如何将Dnsmasq配置为DHCP中继服务器
Mar 21, 2024 am 08:50 AM
DHCP中继的作用是将接收到的DHCP数据包转发到网络上的另一个DHCP服务器,即使这两个服务器位于不同的子网中。通过使用DHCP中继,您可以实现在网络中心部署一个集中式的DHCP服务器,并利用它为所有网络子网/VLAN动态分配IP地址。Dnsmasq是一种常用的DNS和DHCP协议服务器,可以配置为DHCP中继服务器,以帮助管理网络中的动态主机配置。在本文中,我们将向您展示如何将dnsmasq配置为DHCP中继服务器。内容主题:网络拓扑在DHCP中继上配置静态IP地址集中式DHCP服务器上的D
 word中底纹设置在哪
Mar 20, 2024 am 08:16 AM
word中底纹设置在哪
Mar 20, 2024 am 08:16 AM
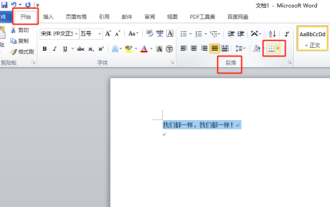
我们平时经常使用word来办公,但是你是否知道word中底纹设置在哪呢?今天我就来跟大家分享具体的操作步骤,小伙伴们快来看一看吧!1.首先,打开word文档,选中一段需要添加底纹的文字段落信息,然后点击工具栏上的【开始】按钮,找到段落区域,点击右侧的下拉按钮,(如下图红色圈出部分所示)。2.点击下拉框按钮之后,在弹出的菜单选项中,点击【边框和底纹】选项,(如下图红色圈出部分所示)。3.在弹出的【边框和底纹】对话框中,点击【底纹】的这个选项,(如下图红色圈出部分所示)。4.在填充的那一栏,选择颜色
 你知道Word表格怎么求和吗
Mar 21, 2024 pm 01:10 PM
你知道Word表格怎么求和吗
Mar 21, 2024 pm 01:10 PM
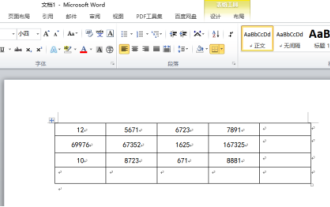
有时候,我们在Word表格中会经常遇到计数的问题;一般遇到这样的问题,大部分同学都回把Word表格复制到Excel中来计算;还有一部分同学会默默地拿起计算器去算。那有没有快速的方法来计算呢?当然有啊,其实在Word中也是可以计算求和的。那么,你知道该怎么操作吗?今天,我们就来一起来看一下吧!废话不多说,有需要的小伙伴赶紧收藏起来吧!步骤详情:1、首先,我们打开电脑上的Word软件,打开需要处理的文档。(如图所示)2、接着,我们将光标定位在求和数值所在的单元格上(如图所示);然后,我们点击【菜单栏
 Word怎么加下划线
Mar 20, 2024 pm 03:16 PM
Word怎么加下划线
Mar 20, 2024 pm 03:16 PM
Word作为我们非常常用的文字处理软件,无时无刻不充斥在我们的生活学习和工作当中。当然,想要利用好Word来编辑文字,地基肯定要打好。那么今天小编就带大家一起来学习一下Word怎么加下划线,可以和小编一起操作,非常的简单。1,首先,我们打开我们需要编辑的文件,在这里我们以下图为例。2,用鼠标选中我们需要编辑的文字,在弹出的选项卡里我们选择【U】图标,操作如图所示:3,我们来看一看效果如何:4,其实我们可以采用一个更加方便快捷的方法,就是利用键盘上的组合键【ctrl】+【U】,即可给你的文字加上下
 word序号如何自动排序
Mar 20, 2024 pm 09:20 PM
word序号如何自动排序
Mar 20, 2024 pm 09:20 PM
在word里边内容多的时候,会有很多章节,我们不可能一个章节一个的进行编写,其实我们可以使用word序号自动排序,操作简单方法还方便,不知道怎么操作的小伙伴们快来学习一下吧!1.首先,我们在电脑上打开要处理的文档,如下图所示:2.打开文档后,选择需要自动排序的文字,本示例选择【第1章】和【第2章】按住Ctrl键实现选择多个区域,选定后用鼠标点击Word的【开始】菜单,如下图红色圈出部分所示:3.点击【段落】工具栏上面的编号右边的小三角符号,在弹出菜单中点击需要选择的序号类型,如下图红色箭头指向所
 Word水印怎么去掉两种方法可以解决
Mar 20, 2024 am 09:19 AM
Word水印怎么去掉两种方法可以解决
Mar 20, 2024 am 09:19 AM
Word软件已经充斥在大家日上办公和生活中,大家在使用Word的时候会想给Word文档加上水印,但是加上水印后想要去掉Word文档水印很多人都不知道怎么去掉,那有些不太熟悉操作Word的小伙伴该怎么办呢?今天就来给大家讲解一下Word里的水印是怎么去掉的。首先用Word文档打开一篇带有水印的文档。然后在工具栏中找到“插入”菜单,在点击【水印】选项。最后在弹出的下拉选项里选择点击【删除水印】选项。操作完成之后我们再回到文档中,就会发现之前文档里的水印就已经被去掉了。不知道大家有没有发现,其实“水印
