今天以一个表单的自动提交,来进一步学习selenium的用法
练习目标
0)运用selenium启动firefox并载入指定页面(这部分可查看本人文章 )
1)页面元素查找(多种查找方式:find_element_*)
2)内容填充(send_keys)
立即学习“Python免费学习笔记(深入)”;
3)iframe与父页面切换(switch_to_frame是切换到iframe,switch_to_default_content是切换到主页面)
4)浏览器交互处理:window.alert, window.confirm, window.prompt
与上面的三个浏览器交互内容,需要用到switch_to_alert,有几个用法需要注意:
a)accept():发送确定指令,相当于点击“确定”按钮
b)dismiss():取消操作,相当于点击“取消”按钮或点击右上角“关闭”
c)send_keys:填充prompt框需要填写的内容
准备工作
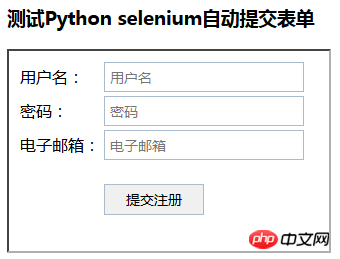
html页面(注册页,内嵌一个注册表单;之所以这样举例,是为了介绍练习selenium的switch_to_frame的用法)
1)注册页面(路径D:\RegisterDEMO\index.htm)
1 2 3 4 5 6 7 8 9 10 11 | <!DOCTYPE>
< html >
< head >
< title >用户注册</ title >
< meta charset = "utf-8" />
</ head >
< body >
< h3 >测试Python selenium自动提交表单</ h3 >
< iframe id = "register_iframe" width = "320" height = "200" border = "0" src = "register.htm" />
</ body >
</ html >
|
登录后复制
2)注册表单(路径D:\RegisterDEMO\register.htm)
1 2 3 4 5 6 7 8 9 10 11 12 13 14 15 16 17 18 19 20 21 22 23 24 25 26 27 28 29 30 31 32 33 34 35 | <!DOCTYPE>
< html >
< head >
< title >这是内嵌表单</ title >
< meta charset = "utf-8" />
< style type = "text/css" >
input[type='text']{border:1px solid #abc; font-size:14px; padding:5px; width:200px;}
input[type='password']{border:1px solid #abc; font-size:14px; padding:5px; width:200px;}
input[type='submit']{border:1px solid #abc; font-size:14px; padding:5px 10px; width:100px; cursor:pointer; margin-top:20px;}
input[type='submit']:hover{background-color:#aaaaff;}
</ style >
</ head >
< body >
< form action = "/register/regaction" method = "POST" >
< table >
< tr >
< td >用户名:</ td >
< td >< input id = "txt_account" type = "text" value = "" placeholder = "用户名" /></ td >
</ tr >
< tr >
< td >密码:</ td >
< td >< input id = "txt_password" type = "password" value = "" placeholder = "密码" /></ td >
</ tr >
< tr >
< td >电子邮箱:</ td >
< td >< input id = "txt_email" type = "text" value = "" placeholder = "电子邮箱" /></ td >
</ tr >
< tr >
< td > </ td >
< td >< input id = "btn_register" type = "submit" value = "提交注册" onclick = "return confirm('是否确认提交注册');" /></ td >
</ tr >
</ table >
</ form >
</ body >
</ html >
|
登录后复制

运行步骤
我们通过Python IDLE一步步来运行,这有助于理解,一步一个操作,惊喜不断
1)引入selenium模块
1 | from selenium import webdriver
|
登录后复制
2)启动firefox并载入注册页面
1 2 | bs = webdriver.Firefox()
bs.get( 'file:///D:/RegisterDEMO/index.htm' )
|
登录后复制
3)查找输入框(用户名、密码、电子邮件)和按钮(提交注册),并填充指定内容
1 2 3 4 5 6 7 8 9 10 11 12 13 14 15 16 17 18 19 20 | bs.switch_to_frame( 'register-iframe' )
account = bs.find_element_by_id( 'txt_account' )
account.send_keys( 'hertz.liu' )
pwd = bs.find_element_by_id( 'txt_password' )
pwd.send_keys( 'pwd123' )
email = bs.find_element_by_id( 'txt_email' )
email.send_keys( 'hertz.liu@mail.com' )
btn_reg = bs.find_element_by_id( 'btn_register' )
btn_reg.click()
|
登录后复制
4)非常顺利的,完成了表单的填充和提交。一般的表单,由于涉及到数据的操作,开发人员都会设置一些二次确认以防止误操作。此处就是用了简单的confirm来进行二次确认,下面是如何让selenium来识别出confirm框,并点击“确定”按钮
1 2 3 4 5 6 7 | confirm = bs.switch_to_alert()
confirm.accept()
|
登录后复制
5)关闭浏览器
以上就是python自动化表单提交的详细内容,更多请关注php中文网其它相关文章!