


Detailed method to transfer DingTalk files to WPS
1. First we open DingTalk. 2. Find the file you want to open and click it, then click Download. 3. Click on other applications to open. 4. Select wps to transfer.
Apr 28, 2024 pm 03:10 PM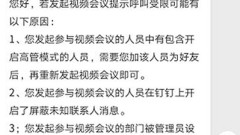
How to handle the DingTalk video conferencing prompt that calls are restricted
1. It may be that the person you initiated to participate in the video conference includes someone who has turned on the executive mode. You need to add him as a friend and then initiate the video conference. 2. It may also be that the invited participants have enabled blocking messages from unknown contacts on DingTalk. 3. Or the department that initiated the video conference has been hidden by the administrator. You can check to see if these are the reasons. In addition, if you encounter other problems, you can also click [My] - [Service Hall] - [My Customer Service] - [Comprehensive Consultation], enter the questions you need to consult in the input box at the bottom of the interface, and DingTalk customer service will provide you with You answer it!
Apr 28, 2024 pm 03:10 PM
Tutorial on joining two classes with one mobile number on DingTalk
One parent account can access different schools and classes at the same time. DingTalk groups generally have an administrator certification process. Individuals can scan the class group QR code to add a class group. Once the administrator has passed, the addition can be successful. You can also directly request the class group administrator to invite your DingTalk account to enter the process. Group, individuals can be added successfully by accepting the invitation. Both methods can achieve the purpose you want. DingTalk supports online devices such as Android phones/iPhones/Windows computers/Mac computers. You can log in to mobile phones and computers at the same time, synchronize messages, and transfer files and messages between mobile phones and computers. But currently only one mobile phone and one computer can log in at the same time. 2 students: It is recommended to use one parent account to log in to the mobile phone and computer respectively for 2 students
Apr 28, 2024 pm 03:10 PM
How to open DingTalk documents on DingTalk_How to open DingTalk documents on DingTalk
1. First open the computer, click to enter DingTalk, and then click to log in. 2. Then click on the avatar name at the top. 3. Then click the Enter Settings button. 4. Finally, click Turn on to always open documents in the browser.
Apr 28, 2024 pm 03:07 PM
How to print approval application records on DingTalk
1. Open DingTalk and click [Work] on the four squares on the left. 2. Open the DingTalk workbench interface. 3. Click [Approval] to open the main approval page. 4. Click [Initiated by me] to see the approvals initiated by me, and you can see which ones have been approved. Click on the approved approval that you want to print. 5. Open the approval you want to print and click the printer button in the upper right corner. 6. When prompted, the print file has been sent to you via corporate message, click [OK]. 7. Download the received files to your computer and print them directly.
Apr 28, 2024 pm 03:07 PM
Introduction to using DingTalk Knowledge Base
In the first step, we first need to know that the DingTalk knowledge base is mainly used to accumulate various knowledge of the enterprise, such as project documents, team affairs management, corporate rules and regulations, etc. The knowledge base has a three-layer structure, which can classify various knowledge well. Management, as shown in the figure below: In the second step, let’s use the knowledge base. Open DingTalk, go to the documentation page, and click on the knowledge base, as shown in the figure below: In the third step, after entering the knowledge base, click the + icon, as follows As shown in the picture: After entering in the fourth step, select the type of knowledge base to be created, here select corporate culture, as shown in the figure below: After entering in the fifth step, modify the content as needed, and click Create, as shown in the following figure: Chapter 1 After creating the knowledge base in six steps, manage the knowledge book of the next hierarchical structure. There are also knowledge pages in the knowledge book.
Apr 28, 2024 pm 03:04 PM
How to turn off DingTalk's little secretary reminder on DingTalk_How to turn off DingTalk's little secretary reminder on DingTalk
1. First, on the DingTalk homepage, click [DingTalk Secretary] to open it. 2. Then click [...] in the upper right corner. 3. Finally, turn on [Do Not Disturb Messaging]. Once turned on, DingTalk Secretary’s push messages will no longer be reminded.
Apr 28, 2024 pm 03:01 PM
The operation process of establishing a group chat on DingTalk Circle
Circles are in the discovery column on DingTalk's homepage and are secondary entrances. Users can create four types of circles: internal circle, online teaching circle, business communication circle, and community operation circle. Among them, the inner circle must choose the organization it belongs to, and the other three are not required. The company you belong to will automatically generate a circle of all employees, such as the circle of all employees of a media company in the picture below. After users click into a circle, they can view all their circles and the dynamics of all circles. The information flow page displays the content published by all circles. Only when the user selects a specific circle will the information of the specific circle be displayed. This is also equivalent to the user having multiple [circles of friends] at the same time. After establishing a [circle], a DingTalk group will be generated at the same time. In group chat, group friends can communicate and interact instantly. with ordinary
Apr 28, 2024 pm 03:00 PM
Detailed methods for remote working on DingTalk
The first step of remote collaboration on DingTalk can be carried out by establishing a very large group chat, collecting employee health statistics, etc., as shown in the figure below: The second step of remote collaboration can also be carried out through video conferencing, group live broadcast, etc., as shown in the following figure: The third step The first step of remote check-in can be carried out by setting up field check-in, DingTalk schedule, etc., as shown in the figure below: The fourth step of team communication can be carried out through organizational address books, all-staff announcements, etc., as shown in the following figure: The fifth step of remote check-in Office efficiency can be ensured by establishing project groups, online documents, online approvals, logs, etc., as shown in the figure below:
Apr 28, 2024 pm 02:58 PM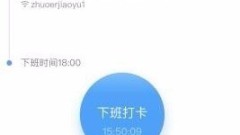
How to set up attendance and punch-in schedules in 'DingTalk'_Tutorial on setting up attendance and punch-in schedules in 'DingTalk'
1. Open DingTalk on your mobile phone, select a job, and click Time and Attendance to enter. 2. After entering, you will see the administrator’s attendance check-in page. We click Settings in the lower right corner. Enter our settings interface. Configure time and attendance clock settings. 3. After that, we choose to add a new attendance group and set the rules. We can set our attendance name, our participating departments and our attendance person in charge. 4. After that, we can set the rules, including our attendance time, attendance date and attendance method. We can choose to practice wifi or map positioning. Both methods are available. 5. After that, we save the attendance group and then schedule it. If there is a fixed shift schedule, we will choose the fixed shift schedule. If there is no fixed shift schedule, then the employees will choose their own shifts. 6. Finally set the schedule
Apr 28, 2024 pm 02:58 PM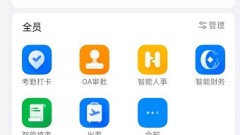
Where to close the DingTalk Attendance Monthly Report_Tutorial on closing the DingTalk Attendance Monthly Report
1. Open DingTalk, click on the workbench, and click on attendance and clocking in. 2. Click Settings in the lower right corner. 3. Select notification management. 4. Turn off the switch on the right side of the personal attendance monthly report.
Apr 28, 2024 pm 02:55 PM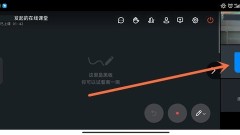
How to read others in DingTalk online class_Specific method to read others in DingTalk online class
1. First open DingTalk Online Classroom and click on someone else’s avatar to open the management interface. 2. Then click to switch the video to a large window. This article takes Xiaomi 12 as an example and is applicable to the MIUI13 system DingTalk V6.5.10 version.
Apr 28, 2024 pm 02:55 PM
How to check online viewing time on DingTalk
After the live broadcast ends, teachers can directly see the duration and number of viewers in the system, evaluate the live broadcast effect, provide reference for their next teaching work, and pay special attention to and remind students who did not watch the live broadcast seriously. If you exit during the live broadcast or the live broadcast is not playing on the mobile phone screen, there will be no viewing time during this period. After the live broadcast, the viewing statistics of this live broadcast will be available, and detailed information can also be exported.
Apr 28, 2024 pm 02:52 PM
How to adjust the volume of video conferencing on DingTalk PC version
Open the DingTalk PC version, enter the group chat, click the video conference icon, enter the video conference preparation interface, click Start Meeting, after entering, click Settings on the lower right to enter the video conference setting interface, adjust the sound, mainly adjust the sound of the microphone and speaker . If you want to adjust the speaking sound, adjust the microphone; if you want to adjust the listening sound, adjust the speaker.
Apr 28, 2024 pm 02:52 PM
Hot tools Tags

Undresser.AI Undress
AI-powered app for creating realistic nude photos

AI Clothes Remover
Online AI tool for removing clothes from photos.

Undress AI Tool
Undress images for free

Clothoff.io
AI clothes remover

Video Face Swap
Swap faces in any video effortlessly with our completely free AI face swap tool!

Hot Article

Hot Tools

vc9-vc14 (32+64 bit) runtime library collection (link below)
Download the collection of runtime libraries required for phpStudy installation

VC9 32-bit
VC9 32-bit phpstudy integrated installation environment runtime library

PHP programmer toolbox full version
Programmer Toolbox v1.0 PHP Integrated Environment

VC11 32-bit
VC11 32-bit phpstudy integrated installation environment runtime library

SublimeText3 Chinese version
Chinese version, very easy to use
Hot Topics
 1665
1665
 14
1424
52
1321
25
1269
29
1249
24
14
1424
52
1321
25
1269
29
1249
24