Home Website Materials PNG material Chinese style faucet Png material

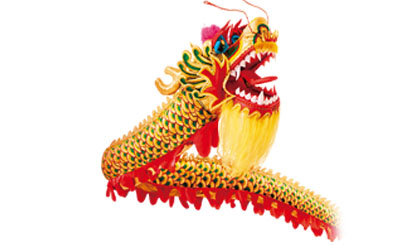
Chinese style faucet Png material

Material introduction: Chinese style faucet free Png material free download Chinese style
Disclaimer

All resources on this site are contributed by netizens or reprinted by major download sites. Please check the integrity of the software yourself! All resources on this site are for learning reference only. Please do not use them for commercial purposes. Otherwise, you will be responsible for all consequences! If there is any infringement, please contact us to delete it. Contact information: admin@php.cn

Related Article

How to make ppt antique style border material How to make Chinese style border ppt material How to make ppt antique style border material How to make Chinese style border ppt material

12 Jun 2024

Next, we insert a rectangle, set the fill color, and the outline to None, as shown in the picture. We select the rectangle [Send to Bottom], and then set the outline color of the notched rectangle to white, as shown in the picture. Finally, we use the [Text Box] to enter the text of the title. Draw circles on the sides of the notched rectangle as decoration and it's done.

Recommended 10 button material png pictures (including psd files) that must be used in shopping mall websites Recommended 10 button material png pictures (including psd files) that must be used in shopping mall websites

03 Jun 2017

Shopping mall websites often use some button materials. Commonly used button materials include buy now, add to shopping cart, buy now, click to follow, receive coupons immediately, etc. The following php Chinese website selects 10 buttons that must be used on shopping mall websites. Material png pictures, including psd files, welcome to download!

How to use AE to create fashionable portrait synthesis How to use AE to create fashionable portrait synthesis

28 Apr 2024

Create a new composition. In the composition properties window, set the width to 1024, the height to 768, the frame rate to 25, and the duration to 5 seconds. Import the material, press the shortcut key ctrl+I, select the required material file, click to open, then drag [Background.jpg] to the timeline window, and set the zoom to 78%. Cut out the background and final composition, drag [Portrait.jpg] above the [Background.jpg] layer in the timeline window, and set the zoom to 78%. Search for the [Color Key] effect in the Effect 4 preset panel, then drag it to the [Portrait.jpg] layer, and then set the relevant parameters in the Effect Settings panel. Drag the [01.png] material into the timeline window and set the zoom to 78%. Final work effect

How to use edius to create video playback effects on mobile phones How to use edius to create video playback effects on mobile phones

17 Apr 2024

Find a picture of a mobile phone in your hand, and then process the picture in PS. The main thing is to remove the black part of the mobile phone screen and make it transparent. Then save the picture in png format, and then export it. At this time the picture material is ready. Import the material pictures into EDIUS, and also import a video that we want to put on the mobile phone. Then drag them to the timeline and select the video material. Enter its video layout page in the information window. The picture above has been adjusted. When opened normally, the size of the video material is larger than the mobile phone screen. This is when adjustments are needed. The main purpose of this step is to make the size and tilt of the video playback fit the mobile phone screen. I patiently adjusted it slowly using the cropping and selection tools. After adjusting, select the

How to create a two-line progress bar with mpb? How to create a two-line progress bar with mpb?

06 Feb 2024

I'm trying to make a two line progress bar with mpb. Let's say I have a slice containing absolute paths to files. list:=[]string{"c:\temp\01.png","c:\temp\02.png","c:\temp\03.png","c:\temp\test.png" ,"c:\temp\test01.png"} I want it to display like this: processing01.png...0/5[]0%processing02.png...1/5[==

Detailed method for producing mirror-cut glass effect in 3Ds MAX Detailed method for producing mirror-cut glass effect in 3Ds MAX

08 Apr 2024

1. First draw a BOX, open the [Material Editor], select a material ball and change the material ball to a mixed material. The steps are as follows: 2. Be sure to select [Discard Old Material], and you will see a mixed material. As shown in the figure: 3. Select Material 1, change the system's built-in material under Material 1 to Vray material, and change the diffuse reflection to blue. The steps are as shown in the figure: 4. Select Material 2, and change the system's built-in material under Material 2. Change to Vray material, change diffuse reflection to mirror, the steps are as shown in the figure: 5. Select [Mask], select the texture as bitmap, and select the black and white texture of your choice, as shown in the figure: 6. Finally, apply the debugged material Give the object, the effect is as follows:

See all articles See all articles